Conductor

Digital Instructions

Huddle Room

Quick Tips for Microsoft Teams

Setting Up A Meeting

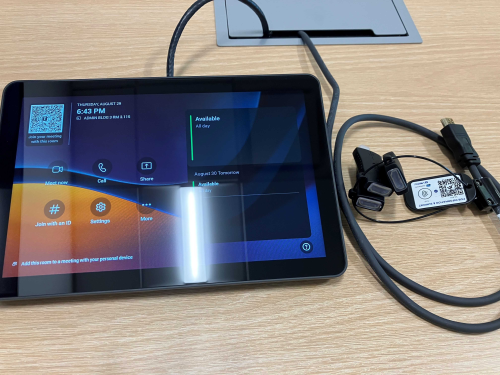
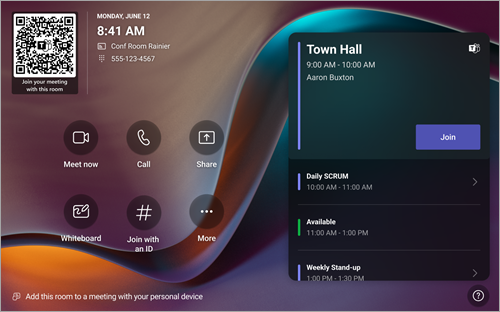
The touchscreen console in a conference room is the heart of every meeting. On the screen, there are a things you can do:

  • Join a Scheduled meeting by selecting the meeting.
    Note: To get a meeting to show on the room console, organizers should set the room as the meeting location.
  • Start a new meeting by selecting Meet Now.
  • Make a phone call by selecting Dial Pad and dialing a number.
  • Project your laptop by plugging in the cable at the table. Multiple display adaptors are available on the provided keyring if your laptop does not support HDMI. Depending on the room setting, it may be projected to the room automatically, or you may have to select “Share” on the room Console.


  • Select More for the instructions on how to add the room to a meeting, give feedback on the device, or change settings.

Managing A Meeting

Managing the Screen Layout

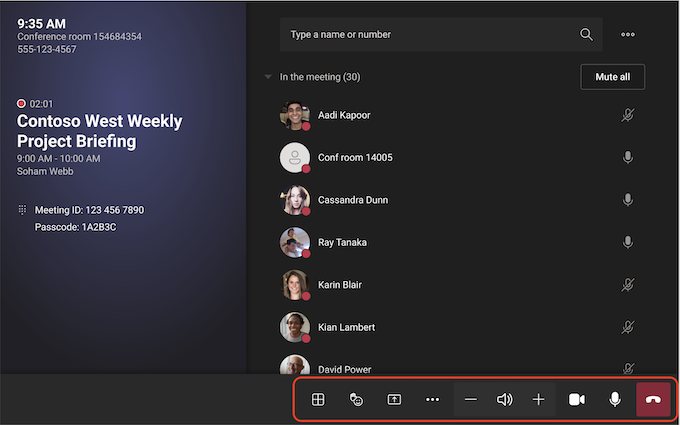
  1. Add a Select Layout on the room Console.
  2. There, you can toggle between different layouts for your room display.

Note: If you have a single display, you can choose between showing just shared content or showing content and a row of people. If you have two displays, one will show content and the other will show people. Selecting Layout will swap which display shows which.

Manage Audio

  • Select Mic on the room console to mute or unmute the room mic.
  • Select Volume Up or Volume Down to adjust the speaker volume or mute the speaker.
  • Mute participants by going to Participants, selecting a name, and then Mute Participant.

Manage Video

  1. Select Camera on the room console to turn the room camera on and off.
  2. Choose which video device you want to use or tap Camera Off to stop streaming the room’s video.

Need Further Help?
Contact Us!