BSW Logo

Conductor

Digital Instructions

MLS Classroom

Quick Tips for Microsoft Teams

Home Screen

This is the main screen the MTR will display while not in use. From here you can access many of the room’s features.

  1. Join a Scheduled Meeting
  2. Start a Meeting
  3. Make a Call
  4. Share content
  5. Join with a Meeting ID
  6. Invite this room into a Meeting
  7. More Options

Join a Scheduled Meeting from the Touch Panel

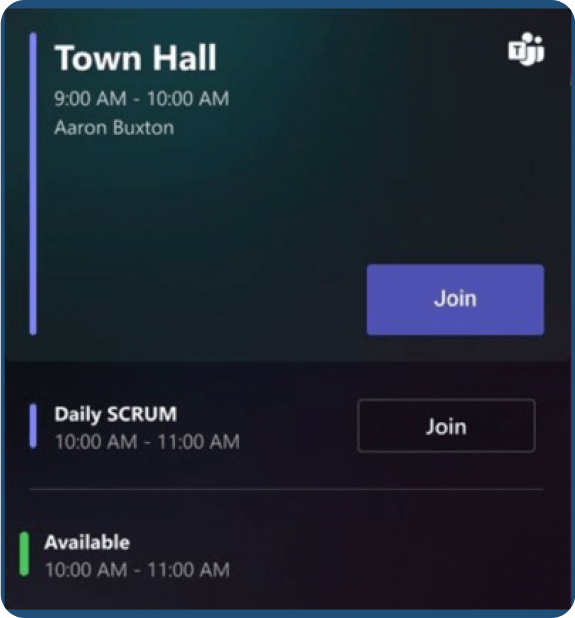
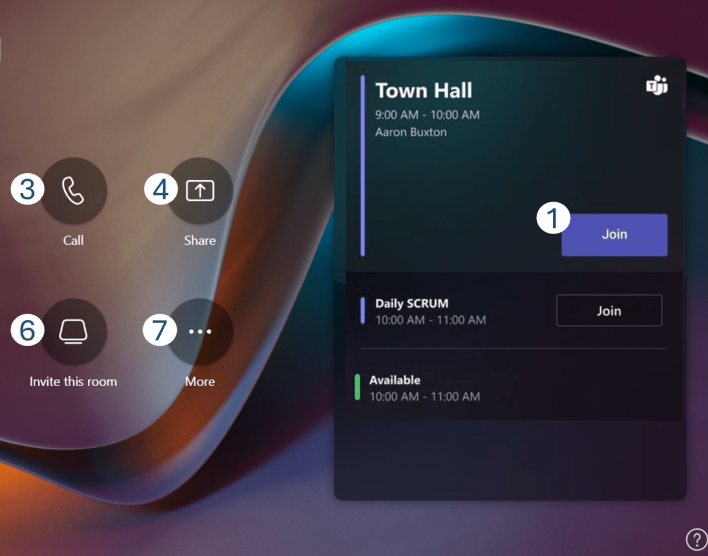
When meetings are scheduled for the room, they will be listed on the home screen.

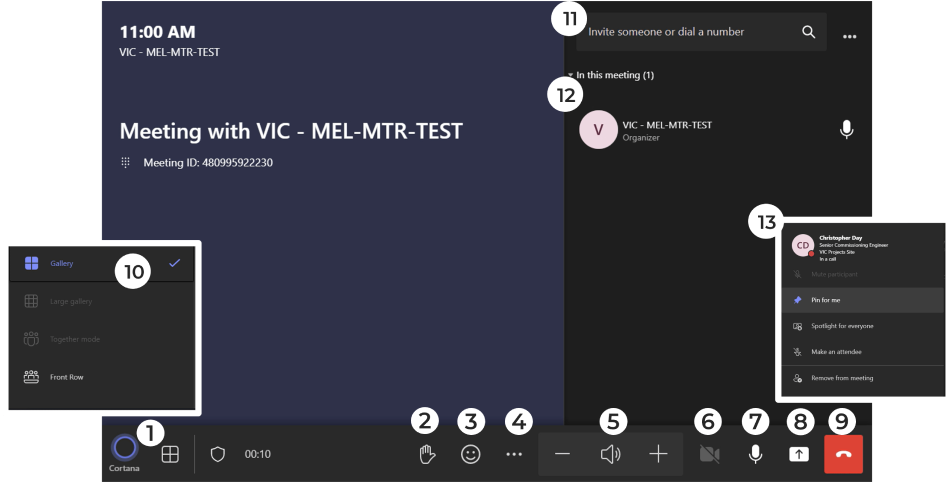
To join your scheduled meeting simply tap the join button.

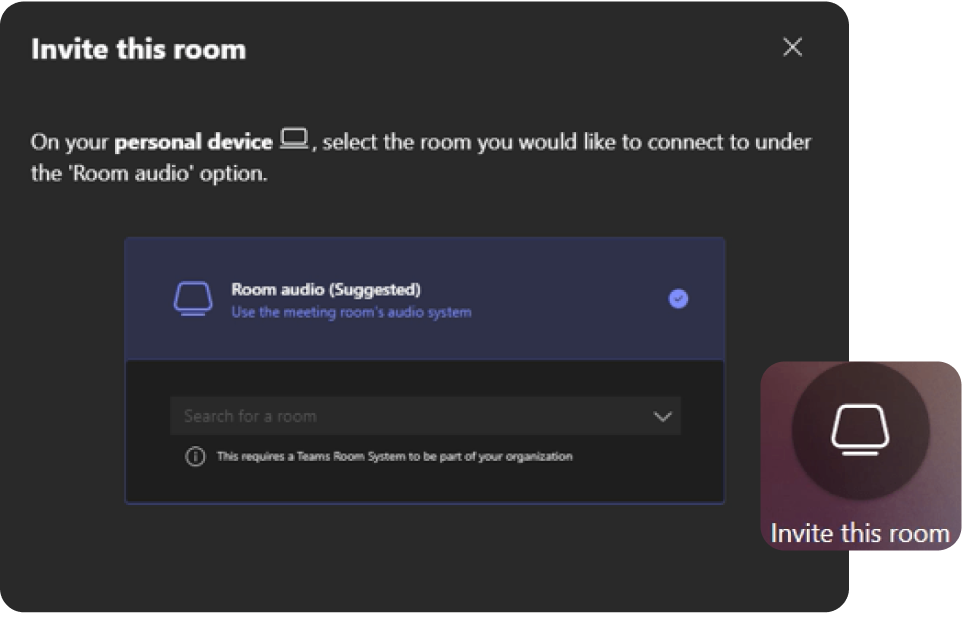
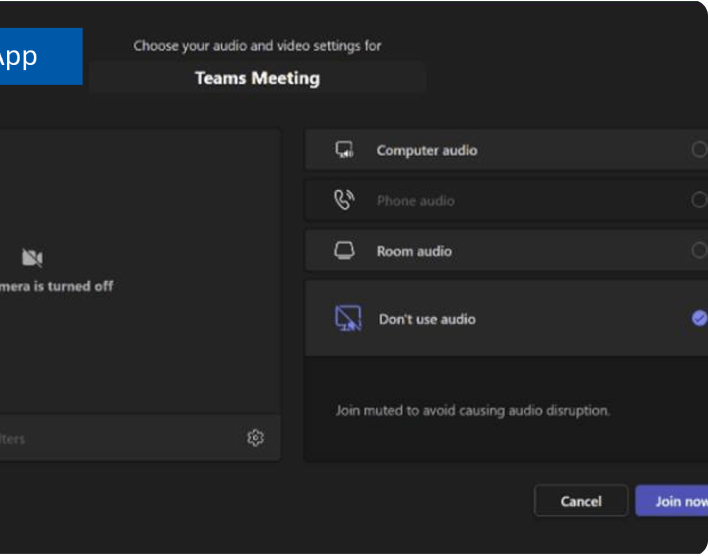
You can also join the meeting whilst in the room from your laptop or mobile phone if you want to present or access meeting chat.

Start a new Ad-Hoc Meeting

When you want to use the system for a new, unscheduled meeting, the “Meet” button allows you to create a new Teams meeting from the MTR system and invite people to it by searching a name or number in the text field.

Make a Call

If your organization has telephony set up for the meeting room, pressing the “Call” button will bring up a dial pad.

Simply dial the number and press “Call”.

You can also dial in participants to a meeting once it is in progress.

Sharing Content

You can easily share content to the display whether you are in a meeting or not.

Simply press the “Share” button and select how you want to share the content.

You can also dial in participants to a meeting once it is in progress.

Note – if you see a coloured frame around your content, it is being shared to remote participants.

Join with Meeting ID

Every teams Meeting has a unique 12-digit ID.

Another way to join a meeting from the room is to add the meeting ID.

You will find the meeting ID and passcode in your Outlook Calendar invite.

Invite and join the Room to a Meeting

If you have a meeting set up in your calendar, or on your device, but the room hasn’t been invited already, you can add the room from your laptop or mobile device.

More Options

If you press the “More” button a new page will open which lets you restart the device, access settings and report a fault.

Joining your Device to the Meeting

You might also want to join the meeting from your device to share content or view people on your device whilst content is on the room display.

When you join from your own device you can select don’t use audio to join the meeting muted and with sound off.

You can also select room audio to use the meeting room audio.

Make sure your device is completely muted to avoid generating feedback.

Meeting Controls

Here’s a quick overview of the controls available when you are in a meeting.

  1. View Options
  2. Raise your hand
  3. Reactions
  4. Options
  5. Volume control
  6. Camera on/off
7. Mute on/off
8. End call
9. View menu
10. Invite someone
11. Participants (tap to manage)
12. Manage Participants

Changing the Layout

You can select from multiple layouts in your meeting.

The available layouts will be selectable depending on your room’s licensing, display format, number of attendees and whether content is being presented.

You can also switch on meeting chat to see messages on the display.

Poly Camera Controls

Access the Camera Controls App

You can configure camera settings both inside and outside of a meeting:

  • Outside a meeting: Select the Camera Controls app icon.
  • Inside a meeting: Select More > Room Controls.

Tracking Controls

  • Enable Camera Tracking and choose a mode:
    • Speaker Tracking – Focuses on the active speaker.
    • Group Tracking – Frames all participants in the room.
  • Set Maximum Zoom for framing:
    • Wide – Maximum field of view.
    • Normal – Mid-range view.
    • Tight – Narrow field of view.
  • Set Camera Movement Type:
    • Auto Pan – Smoothly moves between active speakers or groups.
    • Cut – Quickly switches to the active speaker or group.

Manual Controls

  • Preview Camera View: Select Meet to display the camera’s self-view on the room monitor.
  • Zoom In/Out: Use the Zoom In (+) and Zoom Out (-) buttons.
  • Move the Camera: Use arrow buttons to adjust the camera position.
  • Switch Cameras: If multiple cameras are connected, select the Camera Drop-down Menu to switch between them.
  • Reset Camera to Default View: Select Reset to restore original settings.

Camera Presets

  • Save a Preset: Adjust the camera view, then select Preset 1 to save.
  • Update a Preset: Select More > Overwrite under the preset.
  • Rename a Preset: Select More > Rename, then enter a new name.

Switching Between PC and Laptop (BYOD) Input

The system is set up to automatically switch to your laptop (BYOD) input when a device is connected. Follow these steps to change inputs:

  1. Default Setup:

    • The static PC is the default input. If no laptop is connected, this is the active source.
  2. Switch to Laptop (BYOD) Input:

    • Plug your laptop into the HDMI cable located on the desk.
    • The system will automatically switch to the laptop input.
  3. Return to Static PC:

    • Disconnect the HDMI cable from your laptop.
    • The system will switch back to the static PC as the input source.

If the input doesn’t switch automatically, check that your laptop is properly connected or manually select the input through the room controls.

Need Further Help?
Contact Us!