SecurusTech.net_submission

Conductor

Digital Instructions

Training Room

Quick Tips for Crestron Touch Panel

Start Page

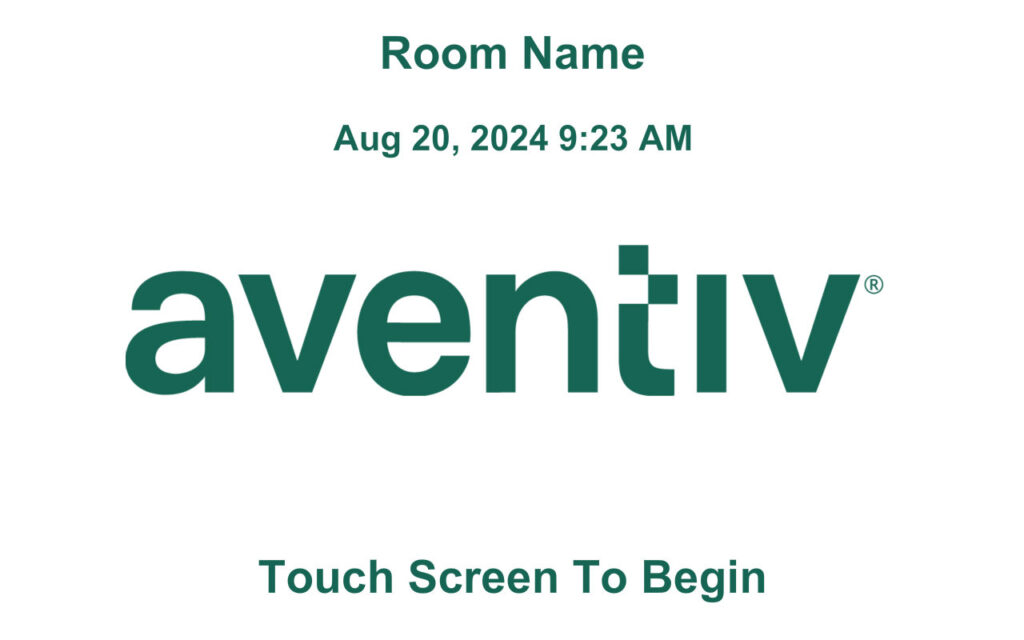
Pressing “Begin” takes you to the Mode Select page.

Mode Select Page

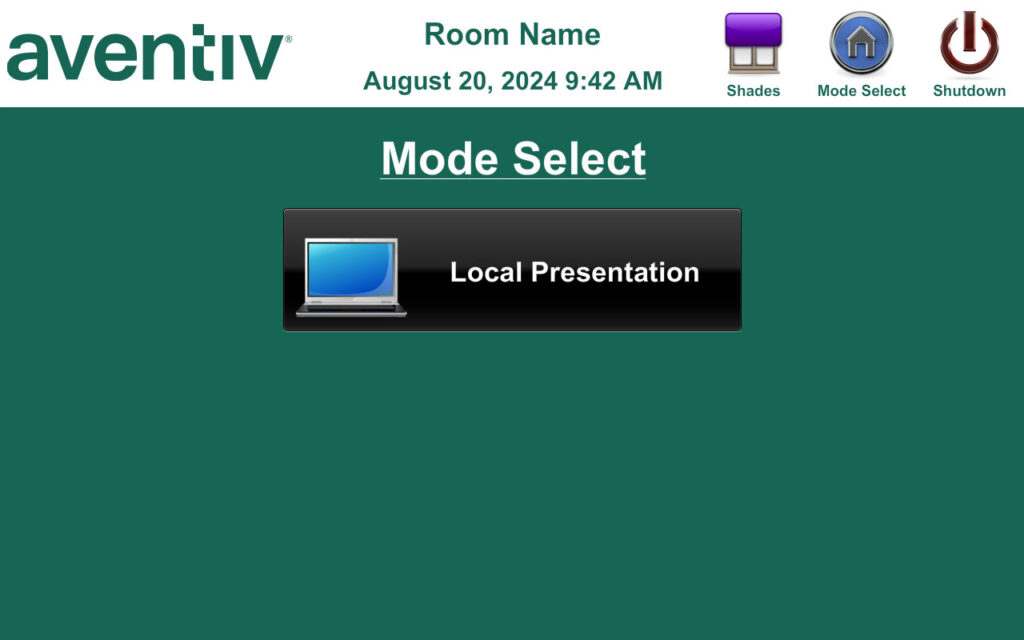
Local Presentation – Takes you to the Local Presentation page, allowing the user to select which source to display on each screen.

Local Presentation Page

Select the desired source to be presented on each display.

Additional controls for system shutdown, camera control, and shade control are available here.

Quick Tips for Barco CX-50 gen2

About the Button

Button layout
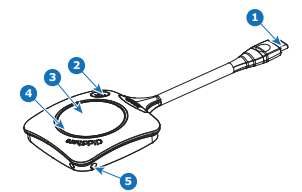
A Button consists of five main components

1 – USB connector
Using the USB connector the Button can be plugged into a laptop (for sharing your screen) or the Base Unit (for pairing the Button to the Base Unit or updating its software). Button R9861600D1C has a USB Type-CTM connector. Depending on the type of USB port on your laptop or on the Base Unit a convertor must be used.

2 – Quick Access Button

3 – Content Share Button
By inserting the Button, the peripherals attached to the Base Unit can be used in the tool of your preference. Click the Button to display the content of the laptop’s screen on the meeting room display. Clicking the Button during the meeting will toggle the sharing of the screen. Click the small button to get additional functionality and controls.

4 – LED ring
The LED ring indicates the current status of your ClickShare.

5 – Lanyard Loop

Basic Use, with Button

Basic functionality
When entering a meeting room equipped with ClickShare and if the display is not in screensaver mode, the ClickShare wallpaper is shown on the display. The content of the wallpaper depends on the setup. Connected peripherals to the Base Unit and their status are indicated on the wallpaper. Starting to use ClickShare is now very simple.

To start using CX-50 Gen2 with a Button
1. Take a Button and insert the Button into a USB port of your laptop. Depending on the USB port on your
laptop a convertor must be used. This convertor is not delivered by Barco.

In the meantime
The white ring on the Button is filling up. When totally filled up it goes to static white and is ready to share
or it starts blinking to indicate that you have to start clickshare.exe on your computer.
On your laptop a new drive appears.
Different situations are possible now:

  • Nothing installed, LED ring fills up and starts flashing, indicating that the executable needs to be
    started by the user. Double-click the ClickShare application.
  • For Windows environment: when connected to internet, driver will be installed and the executable will
    be started by the driver.
  • For Mac environment: CD-ROM drive will appear, open it and launch the application to get started.
  • A launcher or the ClickShare desktop app is preinstalled on your laptop (downloaded from the Base.

Unit or Barco website, or deployed company-wide by your IT department). ClickShare is immediately
available.

In the meantime a Preparing the meeting room… window is displayed.

2. The application is started When the system is ready for use, the share window appears with the message Share to the room.

The LEDs of the Button are static white.

The peripherals such as USB camera, echo cancelling audio device, etc. can now be used in the tool of your preference on your device. Your screen or a typical application can be shared.

3. There are now 2 ways to start sharing:

  • by clicking on the Button.
  • by clicking on your screen or application in the app window.

When clicking on the Button, the LEDs of the Button become static red and your display (screen) is
shared.

When selecting in the app, your choice will be shared.
When audio is enabled on the ClickShare Base Unit, the audio of your laptop is also available on the audio output of the Base Unit, and it will be played via the meeting room audio system.
When a USB echo cancelling audio device is connected to the Base Unit, all audio, content audio and
speaker audio is played via the speakerphone system.
A pauze and stop sharing indication is mode in the app window and the window will be minimized.

ClickShare automatically scales the content of your screen/application to the resolution of the meeting
room display. The aspect ratio of your screen is maintained to make sure the proportions are correct.

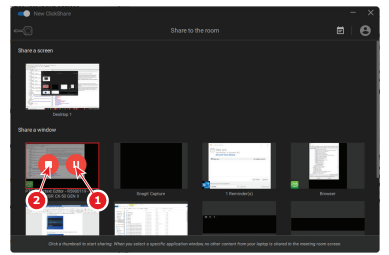
4. To freeze the content on the screen while you look up something on your PC, just click on freeze icon (reference 1) in the shared window. The icon will change to a release icon.

To resume the content sharing, click on that release icon.

5. To remove your content from the display, click the Button again or click on the stop sharing icon (reference 2 on Image 2–6) in the app window. The LEDs of the Button become static white.

6. When leaving the meeting room, unplug the Button from your laptop or click on the exit icon on the upper
right corner. When there was no installation when starting with the Button, no trace of the ClickShare application is left
on your laptop.

Basic Use, with ClickShare desktop app

About the ClickShare desktop app
With the ClickShare desktop app installed on your computer you can enter a meeting room and get on the screen in a few seconds.

The ClickShare desktop app connects to the meeting room screen in order to share your content. Presence detection technology is used to do so. The ClickShare desktop app uses Wi-Fi beacons and an inaudible audio signal to detect the most nearby meeting rooms and show a list of maximum 5 most nearby meeting
rooms, sorted based on signal strength on your computer. Just click on your meeting room name. This means you will never have to enter IP addresses or scroll long lists of meeting rooms before being connected to your meeting room.
The ClickShare desktop app can be used with or without a Button.
ClickShare desktop app installation
When the ClickShare desktop app is not pre-deployed in your IT environment, you can download and install he software without administrator rights from www.clickshare.app .
New or old user interface
When it starts up in the current used version (called old version), user can switch up to the new version directly
in the application by clicking on Switch to the new version.

App based conferencing

About app based conferencing
App-based Conferencing enables you to use the meeting room camera and speakerphone as soon as you’re connected to the room with the ClickShare Desktop App. With this, the ClickShare Desktop App enables you to join your Zoom, WebEx, or Microsoft Teams calls in a single click, and to use the room camera and speakerphone in that call without needing to plug in a Button.

App-based Conferencing requires version 4.15 or higher of the ClickShare Desktop App, installed
through the MSI installer, with the App-based Conferencing feature enabled. Installation can only be
done with administrator rights on your computer. Contact your IT administrator to install or deploy it for you.

How it works
1. Click on the ClickShare icon to open the ClickShare Desktop App
Select the meeting room out of the displayed list of nearby meeting rooms.
Connect to the meeting room.
or
when the PresentSense function is active in that meeting room and on your PC, just walk in and click Connect to get started.

As soon as you are connected to the room, the meeting room peripherals (camera, microphone, and speaker) become available on your computer and are ready to use in your video call.

2. At the end of the meeting, simply disconnect from the meeting room or walk out and the devices will disappear from your computer

Extended desktop

About extended desktop
Depending on your selection, your primary screen or your extended screen will be captured and displayed via ClickShare. That extended screen can be a physical screen or a virtual screen. The use of the extended desktop functionality does require the extension pack to be installed on your device.

With extended desktop you can take advantage of both your laptop screen and the central meeting room display. Presentation notes or other material on primary screen will not be displayed to everyone (so-called PowerPoint Presenter mode) or when you want to take notes whilst sharing something else..

Note that the Presenter mode can also be achieved without the use of the extended desktop and one can also choose to share only the application you wish to share in the room via the sharing mode toggle 

PC with virtual extended screen:

Primary screen displayed on the PC, extended screen displayed on the meeting room display.

PC with one extended screen connected. That extended screen will be captured and displayed on the meeting room display.

How to select
1. Click on the menu icon of the Ready to share message.

2. Check the check box before Extended desktop

Share an application

About sharing an application
When Share an application is selected, you will be presented with an overview of open applications on your computer. Once you select an application to share, only this application will be shared on the big screen

How to select via the application window
1. When a Button is plugged in or the ClickShare desktop app is ready to share..

The last 6 open applications on your computer are displayed.

2. Click on the application to share. A red square indicates the selection. Only the selected application is shared on the meeting room display.

Via the Quick access button
1. Push the quick access button and click on the share an application icon.

2. To display an application, select Share an Application.

The last 6 open applications on your computer are displayed.

3. Click on the application to share. A red square indicates the selection. Only the selected application is shared on the meeting room display.

View room display

About view room display
When connected to a Base Unit, you can access the content which is shown on the meeting room display by selecting View room display. When doing so, a new window will open in which you will find an exact copy of what is on the meeting room display. This is useful when e.g. sitting in the back of the room, when you are taking meeting notes or when you wish to share what is shown in the room (by yourself or others) to remote participants in a UC&C call.

How to view
1. With a Button plugged in or the ClickShare desktop app ready, click on the hamburger menu and select View room display.

Stop sharing and leave

With the ClickShare desktop app
When your meeting has come to an end, stop sharing by hovering over the red bar to expand the interface and clicking the full red circle.

Disconnect from the meeting room by either clicking the “Disconnect” button or by simply closing your laptop.

With a Button
Click the Button and unplug the Button from your laptop.

Audio configuration

Audio configuration
The connected user must control his own audio signal using the audio configuration of his computer. If he does not want to broadcast his audio signal, he has to mute audio on his computer. For some operating system, it is necessary to set ClickShare as your default output device. Once you unplug the Button, the default setting is switched back to the previous setting. The speakerphone selection is also selected.

Audio configuration
The following configuration is the expected configuration for the playback devices when plugging the Button. ClickShare speaker as default device and room speakerphone as default communications device. The speakerphone is available and can be used even when not on screen. The sound coming out of the speaker is only heard when sharing content. With this defaults, the content audio will be played by the speakers and communication clients (UC&C and conferencing tools) will use the room speakerphone. For best experience, the room speakerphone should be selected in the communications client at all times.
Difference is that the audio from the Speakers will be lip-synced with the content, but will have higher latency. The communications device is optimized for the lowest latency possible, but no lip-sync is guaranteed with the video. For an optimal conference, the audio should always be transferred with lowest latency possible and will get priority over video.

Pairing

Pairing of the Buttons with the Base Unit
To be able to use a Button it should be assigned to the Base Unit you are using. This process is called pairing. All Buttons will need to be updated and paired before use. In case you buy additional Buttons or when a Button should be assigned to another Base Unit, the Button needs to be paired (again). The Button software update runs in the background and will not impact users while using the system. When downgrading or updating to an older version of the Base Unit software the Button need to paired manually to update their software.

To pair a Button to the Base Unit by plugging in
1. Insert the Button in the USB type-CTM port available on the Base Unit you are using.

The Base Unit LED is blinking while the Button LED fills up a circle. This means pairing is in progress. The Base Unit automatically checks whether the software of the Button is up to date. If not, the Base Unit updates the Button software. This may take more time. The result of the pairing process can be as follows:

  • When the LEDs on the Button become green and static white on the Base Unit, the Button is paired to the Base Unit. You can unplug the Button from the Base Unit.

2. Unplug the Button from the Base Unit.
The Button is now ready for use.

Airplay

About Airplay
Airplay is a protocol that allows wireless streaming between devices of audio, video, device screens and photos. The ClickShare Base Unit can be configured to receive the airplay streaming


Why Airplay
You want to show multiple people your photos and videos or your PowerPoint and Keynote presentation on a big screen? Connect your device to the ClickShare Base Unit which can be configured to receive the Airplay streaming.


How to use Airplay
1. Make sure your device is connected with the ClickShare WiFi in the meeting room.
2. Open the control panel of your device and swipe up from the bottom left of the screen or swipe down from the top right of the screen, depending of your device.
3. Click on Synchronise display and select the ClickShare device in the meeting room.

Need Further Help?
Contact Us!