BSW Logo

Conductor

Digital Instructions

Confrence Room

Quick Tips for Microsoft Teams

Setting Up A Meeting

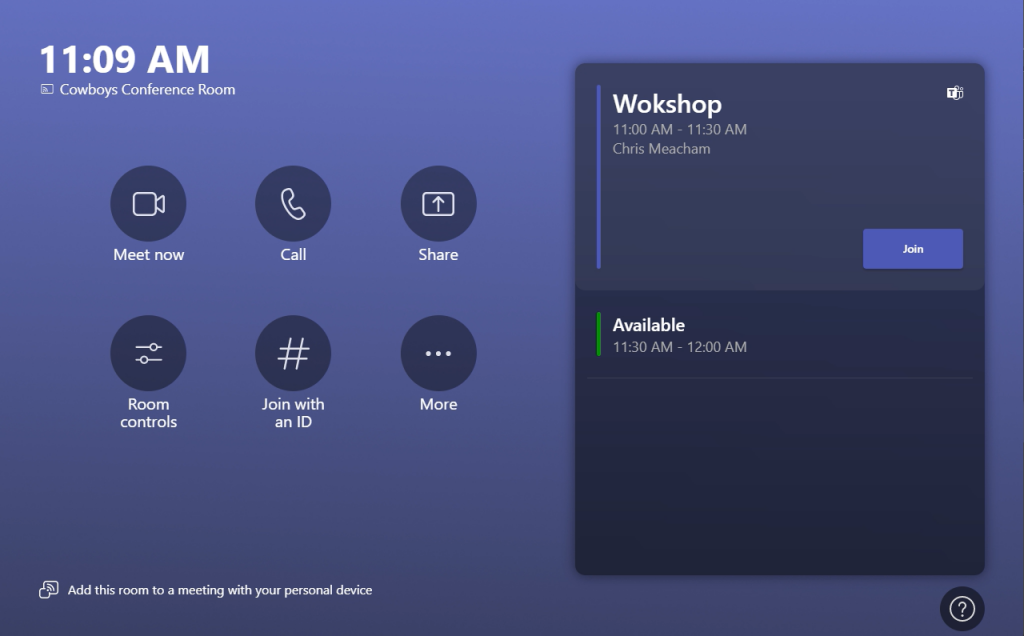
The touchscreen console in a conference room is the heart of every meeting. On the screen, there are a few things you can do:

  • Join a Scheduled meeting by selecting the meeting.
    Note: To get a meeting to show on the room console, organizers should set the room as the meeting location.
  • Start a new meeting by selecting Meet Now.
  • Make a phone call by selecting Dial Pad and dialing a number.
  • Project your laptop by plugging in the cable connected to the console. Depending on the room setting, it may be projected to the room automatically, or you may have to select Present on the room Console.
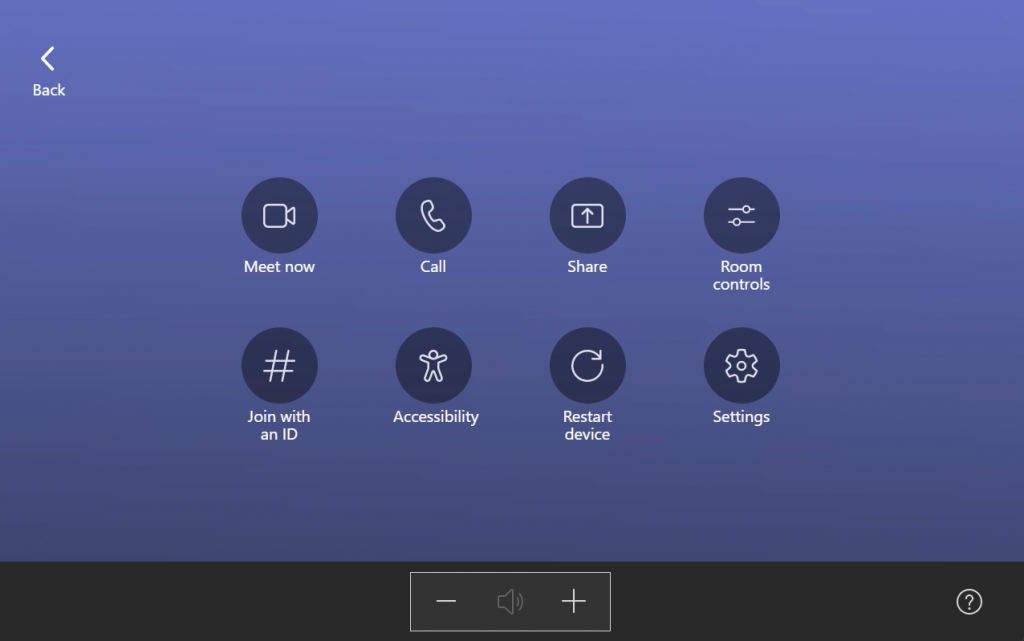
  • Select More for the instructions on how to add the room to a meeting, give feedback on the device, or change settings.

Managing A Meeting

Managing the Screen Layout

  1. Add a Select Layout on the room Console.
  2. There, you can toggle between different layouts for your room display.

Note: If you have a single display, you can choose between showing just shared content or showing content and a row of people. If you have two displays, one will show content and the other will show people. Selecting Layout will swap which display shows which.

Manage Audio

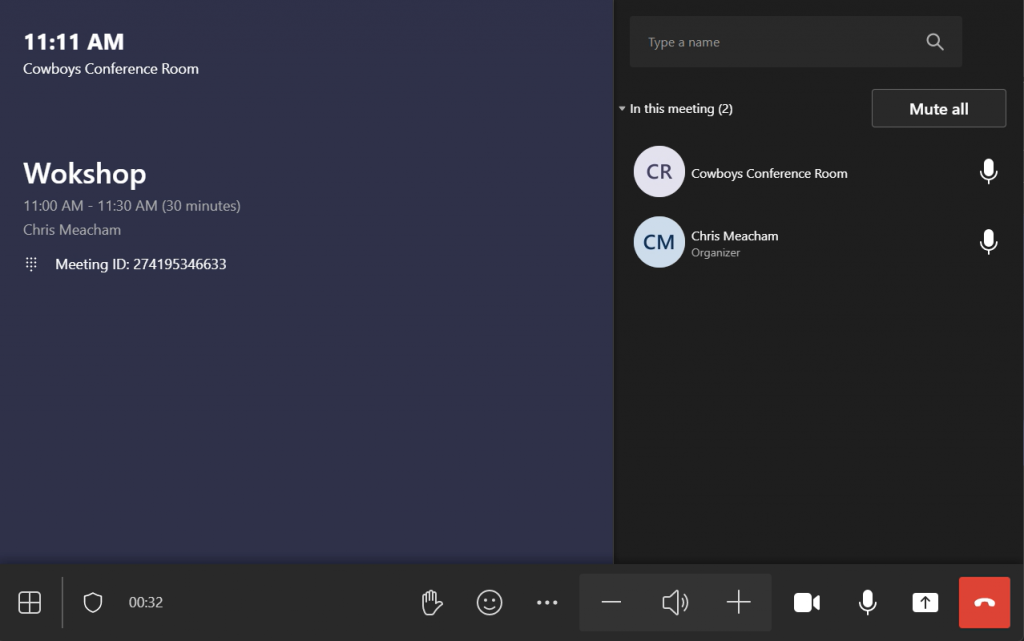
  • Select Mic on the room console to mute or unmute the room mic.
  • Select Volume Up or Volume Down to adjust the speaker volume or mute the speaker.
  • Mute participants by going to Participants, selecting a name, and then Mute Participant.

Manage Video

  1. Select Camera on the room console to turn the room camera on and off.
  2. Choose which video device you want to use or tap Camera Off to stop streaming the room’s video.

Note: For now, you can only switch between cameras on Skype for Business.

Access Room Controls

Access Room Controls while on the Home Screen

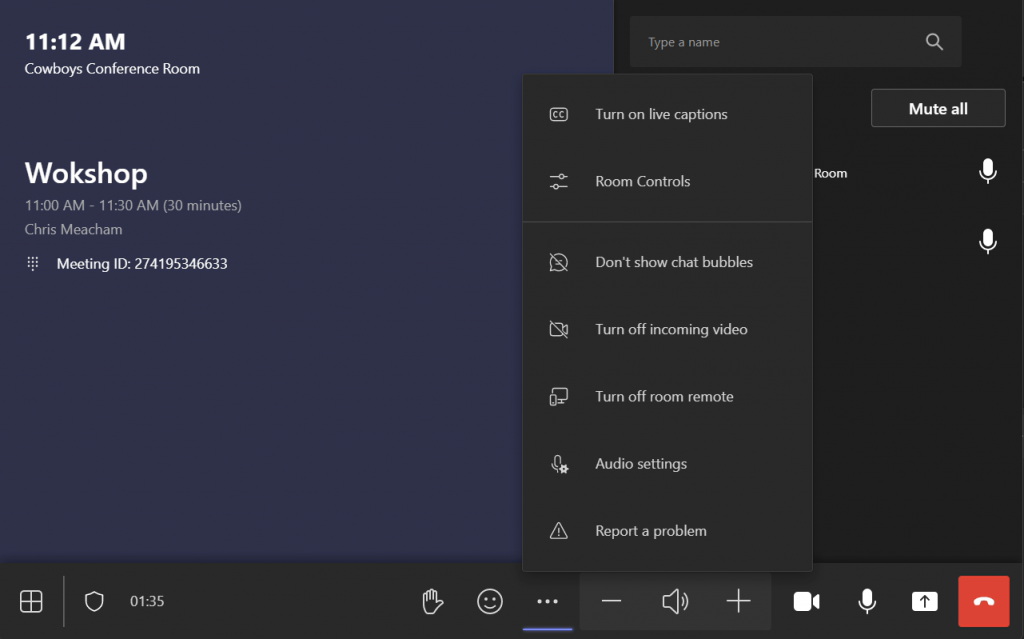
Access Room Controls while in a call

Note: Your display and icons may differ slightly to those shown on this page depending on the version of Microsoft Teams that you have. However, the process remains the same.

Accessing Camera Control

Tracking Controls Screen

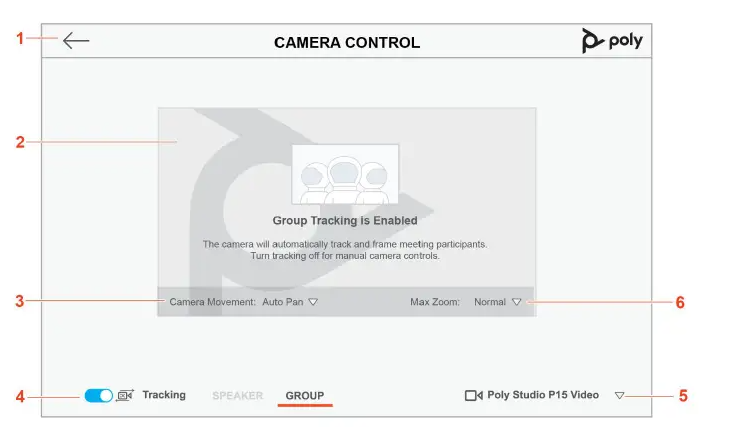
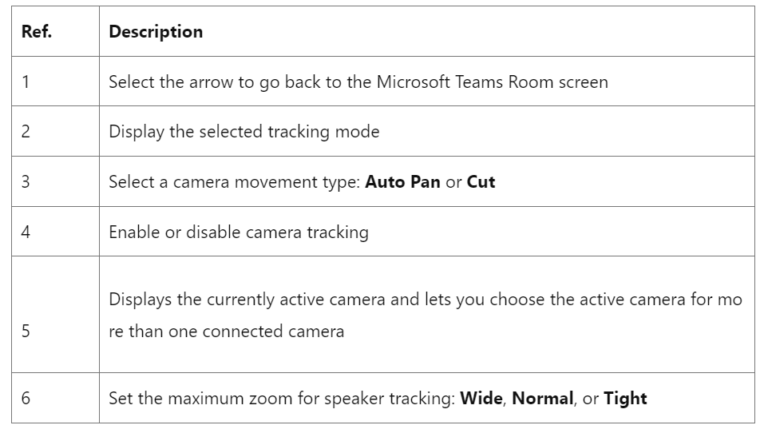
The Camera Controls camera tracking screen includes the following features:

Set the Tracking Mode 

Enable tracking and choose one of the following:

  • Speaker – Tracks the active speaker.
  • Group – Tracks the participants as a group.

Set the Maximum Zoom
Set the maximum zoom for framing active participants.

In the Max Zoom drop-down menu, choose one of the following:

  • Wide – Uses the maximum field of view.
  • Normal – Uses a mid-range field of view.
  • Tight – Uses a narrow field of view.

Set the Camera Movement Type
Set the camera behavior when it detects changes to the active participant or group location.

Select the Camera Movement drop-down menu and choose one of the following:

  • Auto Pan – The camera pans smoothly between the active speakers or group.
  • Cut – The camera quickly moves to the active speaker or group.

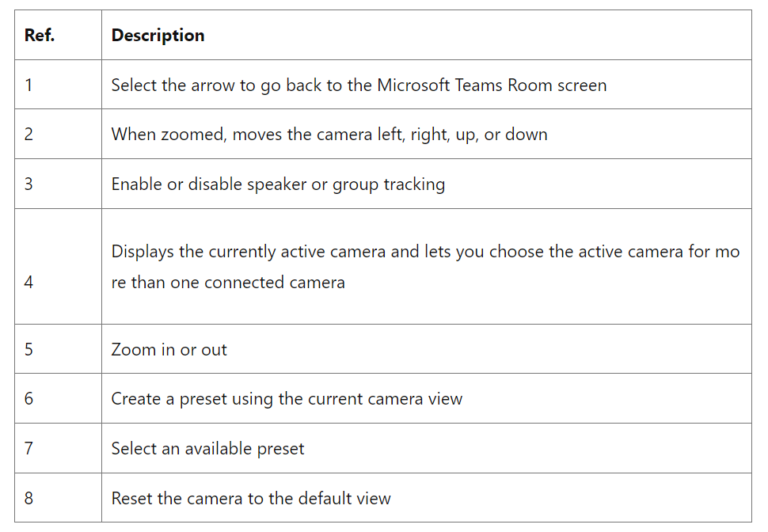
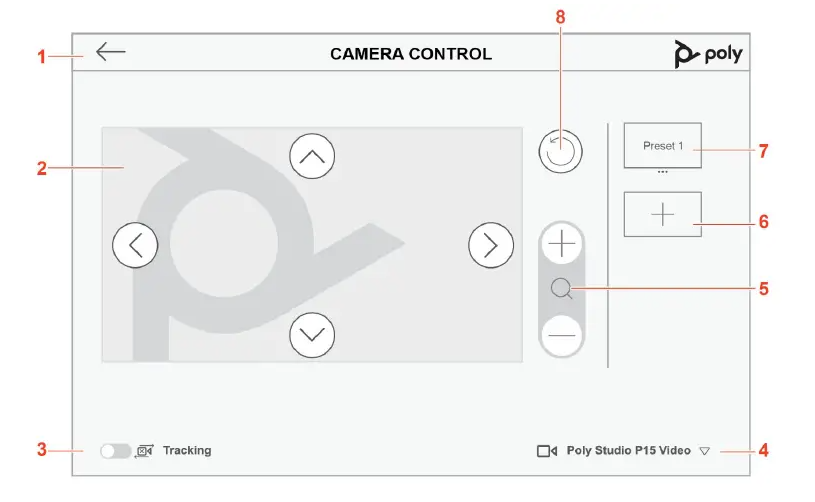
Manual Controls Screen

Manually control the connected camera(s).

Zoom the Camera In Or Out 

Do one of the following:

  • Select Zoom In + to zoom in the camera.
  • Select Zoom Out – to zoom out the camera.

Move the Camera 

  1. Zoom in the camera.
  2. Use the arrow buttons to move the camera.

Select the Active Camera
For more than one connected camera, choose the active camera in or out of a meeting.

Select the camera drop-down menu and select a camera.

Reset the Camera to Default View
Restore the default camera settings.

Select the Reset poly Camera Tracking App for Microsoft Teams Rooms on Windows-3 button.

Set a Camera Preset
Save specific camera views for future reference.

After adjusting the camera view, select Preset 1 poly Camera Tracking App for Microsoft Teams Rooms on Windows-4.
The camera view is saved.

Adjust a Camera Preset
After adjusting the camera view, update the preset.

Under the preset, select More poly Camera Tracking App for Microsoft Teams Rooms on Windows-5Overwrite. The preset saves the current camera view.

Rename a Camera Preset
After setting a preset, add a descriptive name.

  1. Under the preset, select More poly Camera Tracking App for Microsoft Teams Rooms on Windows-5 Rename.
  2. Enter a new preset name.

Need Further Help?
Contact Us!