Conductor
Digital Instructions
BSW Classrooms
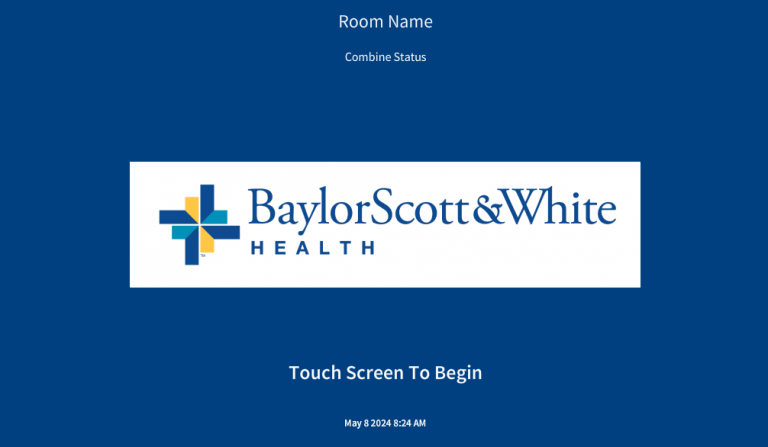
Start page
Touch anywhere to begin as indiciated at the bottom of the page.
This page will show you what room that specific touchpanel belongs to at the top Labeled “Room Name”
It will also indicate what combine state the space is in.
MODE SELECT PAGE
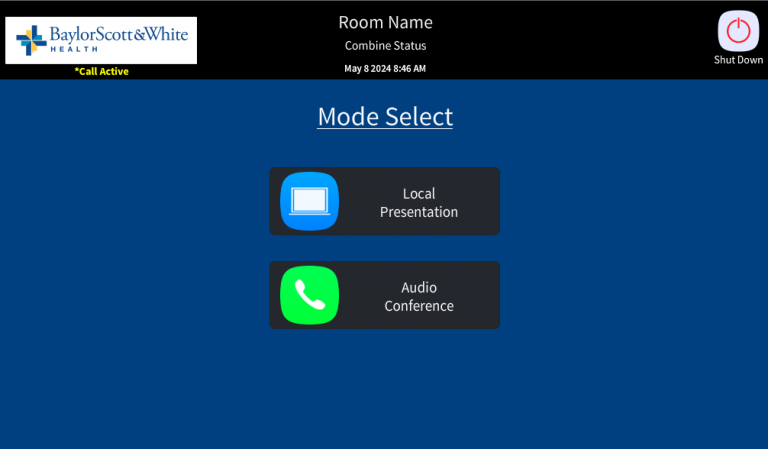
Local presentation will allow you to make a Presentation in the space using the displays and video content. Use this for a “Teams” call, any PC Conferencing Call or to share a laptop. Audio Conference may be added at any time.
Audio Conference is for when you only want to use the phone functionality of the space. NO displays will be used with this options.
LOWER CONTROL BAR
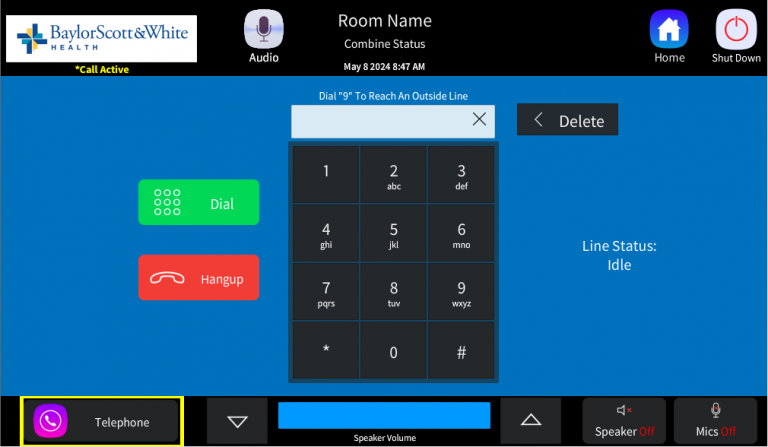
Here, there is volume adjustment up and down and a meter to indicate where the volume level is at.
Enter the phone number you wish to dial, starting with “9”, and press the dial button to call the inputted number. The Hangup button will end the call.
On the right hand side, there is a master speaker mute, and a master mic mute. This turns all speaker feed OFF, and all mic feed OFF. By default when you start using the system, both mutes are OFF.

AUDIO CONFERENCE PAGE
This page is where you make phone calls. Enter the phone number you wish to dial, starting with “9”, and press the dial button to call the inputted number. The Hangup button will end the call.
There are YELLOW indicators that will appear on page when the system is in an active call.
LOCAL PRESENTATION PAGE
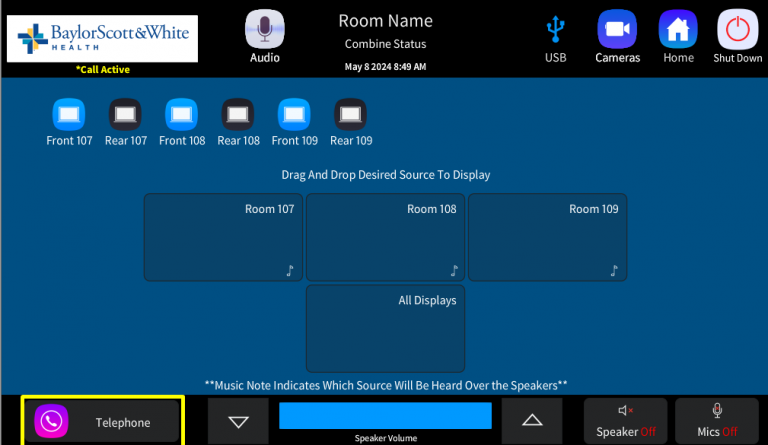
This page is where you will route video sources to video destinations. Simply place your finger on a source, drag it to the destination and drop it to have it appear on that screen. Whichever display has the music note on it is the audio source you will hear in the room.
The control system will automatically reconfigure all the available sources and destinations based on room combined status.
A source labeled “front” is on the display wall side.
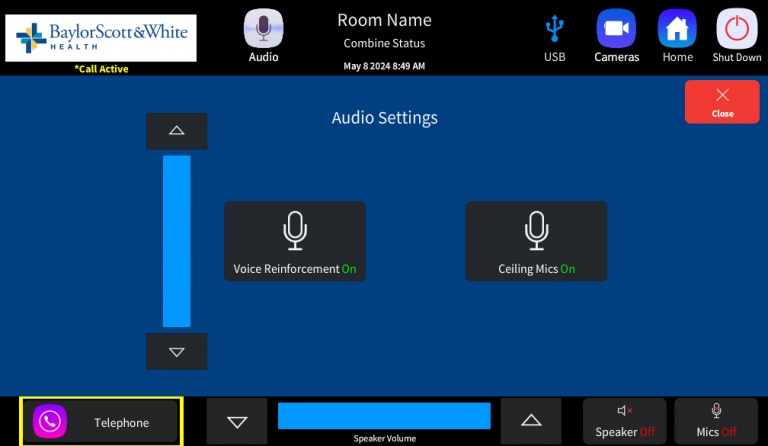
AUDIO SETTINGS
This page allows you to adjust Voice Reinforcement, when presenters within the room are utilizing the wireless microphones and local voice audio is coming from within the room speakers.
If you have a soft-spoken presenter you can turn up the level, if you have a loud presenter, you can turn it down here.
You can disable Voice Reinforcement with the mute button on the right of the level adjustment.
Wireless microphones MUST be utilized to hear the presenter over the ceiling speakers within the space(s), regardless of call status.
The ceiling mics only go to the far side of the call, and this is where you can mute them if you don’t want to transmit whole room mic audio to the far side.
USB SETTINGS to Host a Call from a Laptop
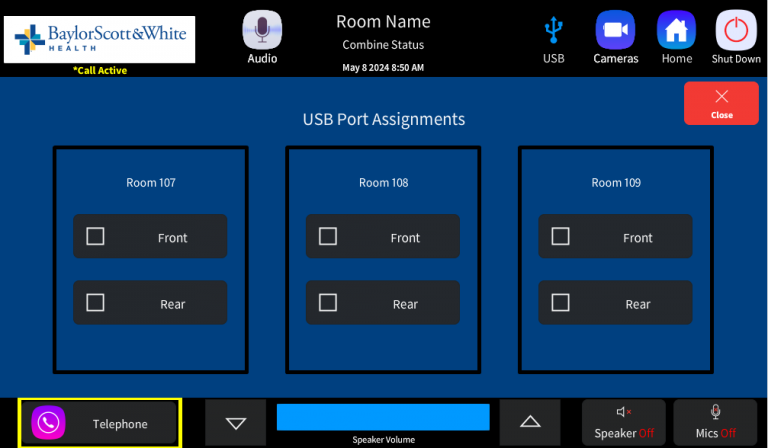
On this page, you choose which wall plate the USB features are routed to. Please make sure you are plugged into the USB wall plate selected on the page. This will attach your computer to the room’s microphone, speaker, and camera feed for when you make a Teams or other PC call.
Every single USB plate in each space is the same. It does not matter which one you are plugged into, you just need to ensure that there is a checkbox next to the plate you are plugged into to get the devices attached to your machine.
Note: if the Room USB connections do not show in your USB settings, please disconnect and reconnect your USB connection to the wall plate. This will re-sync the request and should show the room USB options.
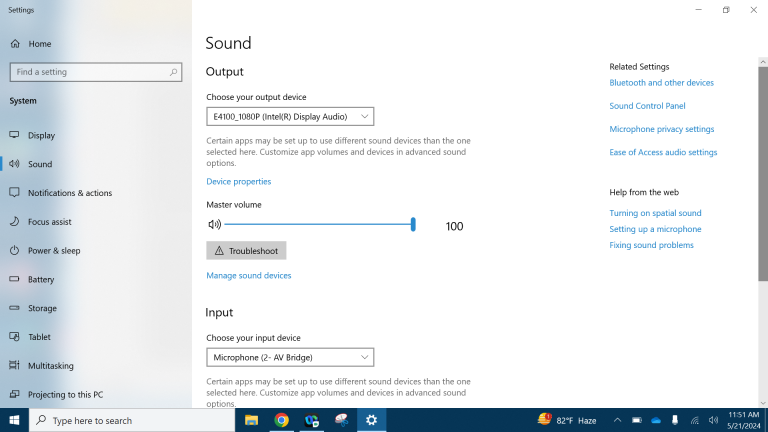
Sound
“OUTPUT” should be set to “E4100_1090P (Intel(R) Display Audio)”
(volume at 100)
“INPUT” should be set to Microphone (2- AV Bridge)
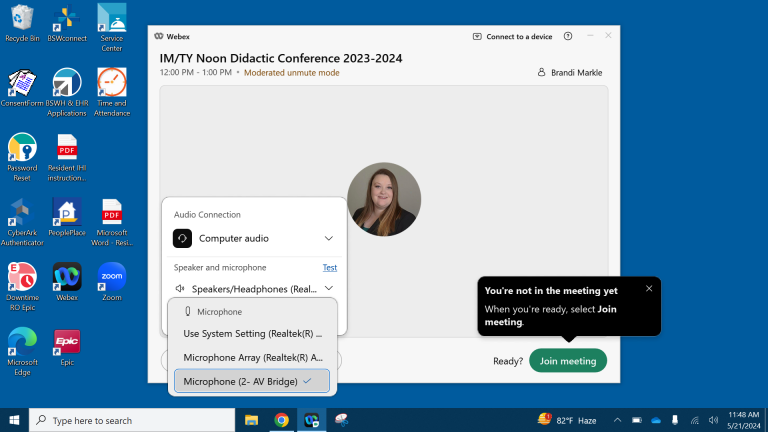
Inside of a Teams call, Audio Setting is “Microphone (2- AV Bridge)”
CAMERAS
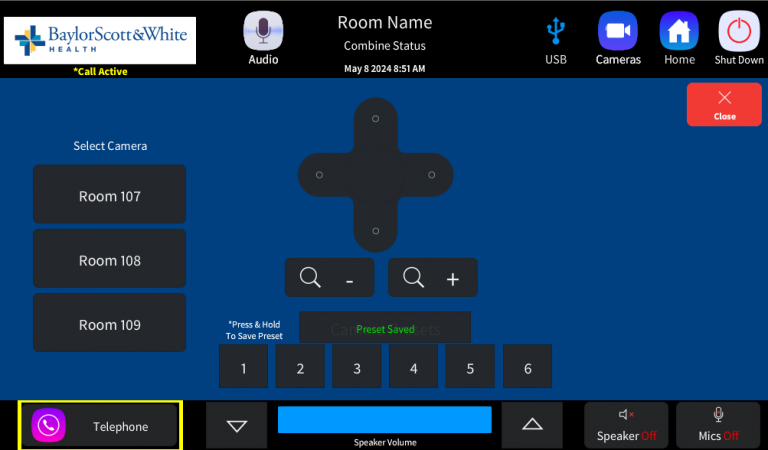
Standard camera controls Up/Down/Left/Right/Zoom IN/Zoom Out.
Sometimes, depending on what conferencing application you are using, the controls for left and right are backwards. Look at the video feed for best results when using these controls.
The Presets work like a car radio. Press to recall a position, press and hold to save over any saved position for that specific preset.
The “Room #” buttons on the left side of the page are how you select which camera you are using depending on combine/divide state. The only options you will see are camera feeds that are in the room / combine state you are in.
For example, when room 107 and 108 are combined, you will only see room 107 and 108 controls on their respective panels.
109 would be on the 109 panel only in this instance.
ADMIN PAGE
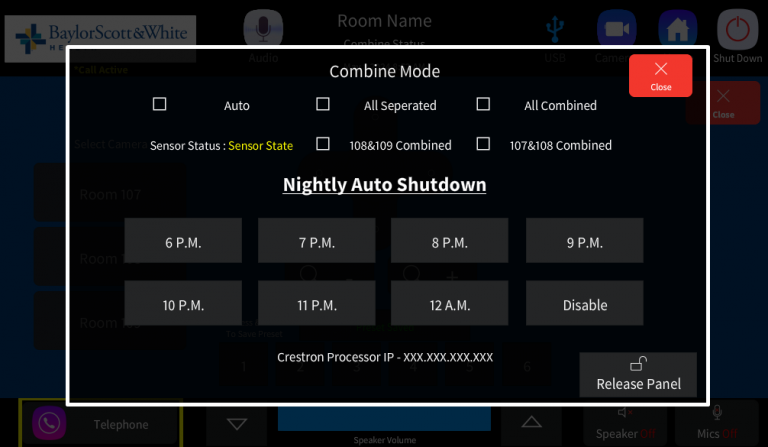
This page is supposed to be a secret. Press and hold for 3 seconds on the BSWH logo in the top left of the page to show this page. YOU CAN MESS UP THE ROOMS COMBINE STATUS AND THIS NEEDS TO BE ADJUSTED ONLY IF YOU ARE SURE WHAT YOURE DOING, PLEASE CONTACT TECH SUPPORT IF YOU ARE UNSURE.
This allows manual adjustment of combine status. “Auto” uses the sensors and is the reccomended setting, the yellow text will tell you what the sensors are currently reading. The other options force the space into that specific configuration.
Nightly auto shutdown will shut the space down at the indicated time. 5 minutes before shutdown, a pop up will appear letting you know that the system will auto shutdown in 5 minutes, and offer a 1 hour delay if you need it.
The “Release Panel” button is how you get the panel off the wall. It will not be visible when it is off the wall.
