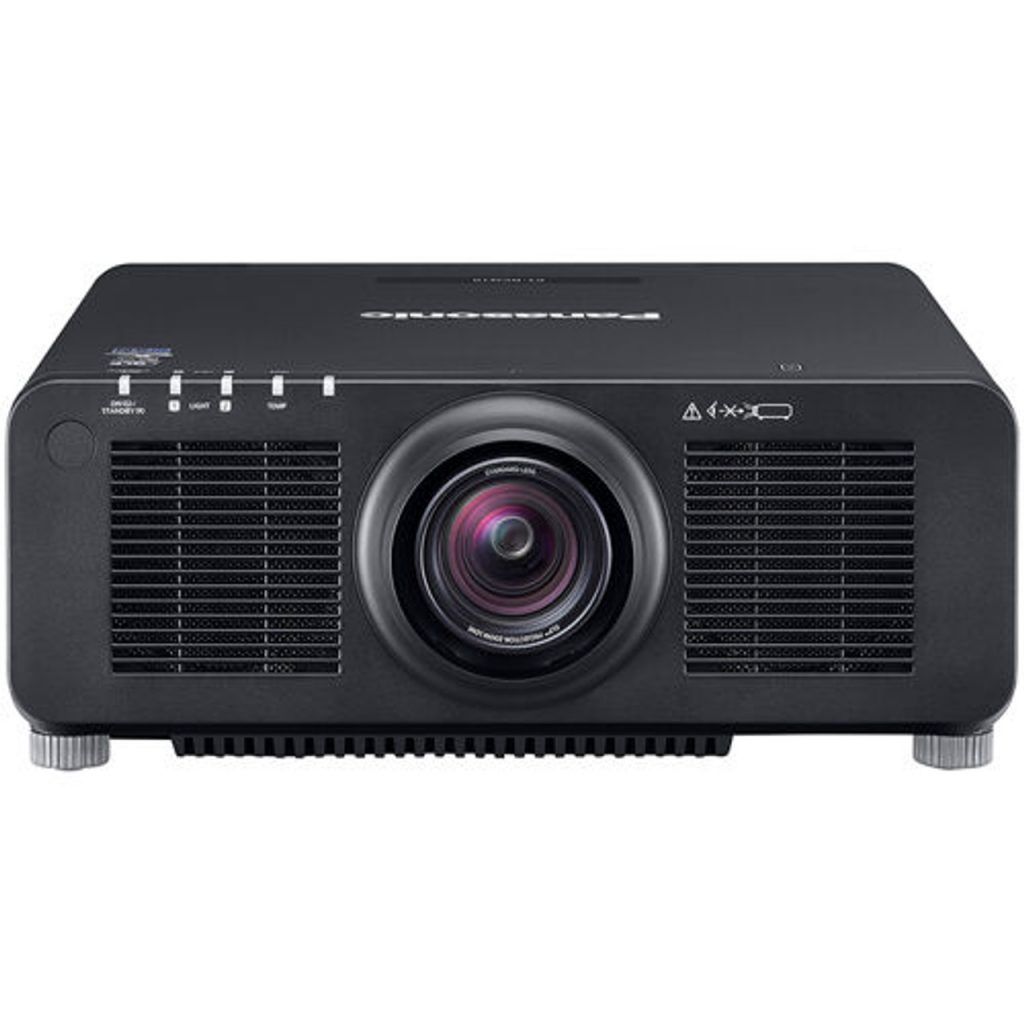
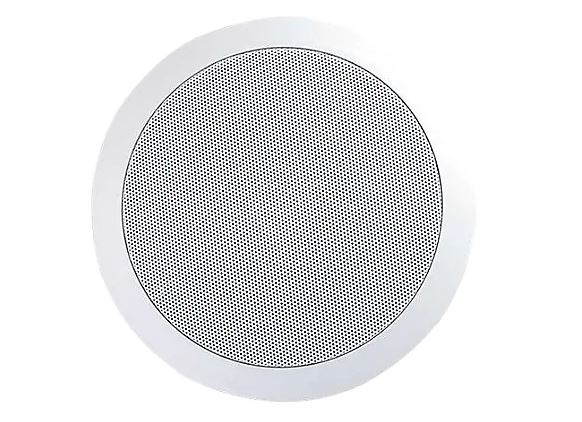
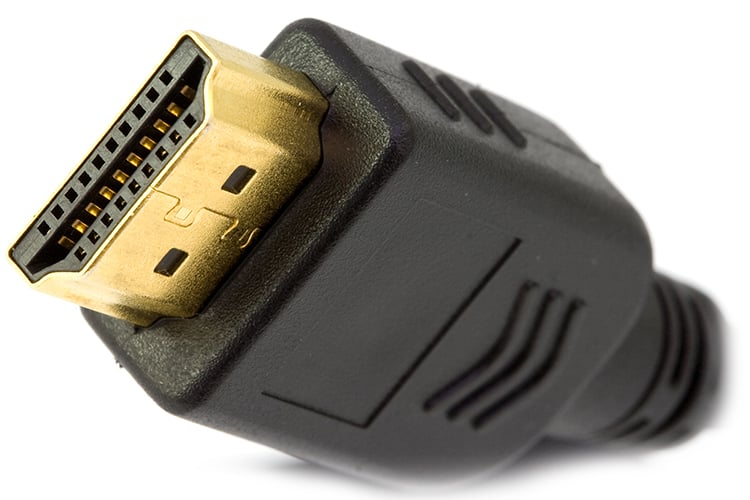


The conference room technology supports wired and wireless laptop presentation. Additional features include audio calls, and video conferencing. The system components include displays, HD Cameras, microphones, speakers, and an HDMI for device connection.
You will also find a touch panel to control the room system. The Pinnacles room is a three way divisible space that allows you to have up to three smaller meetings or one large meeting. This allows for multiple room configurations. Please IF facilities for help with room config.
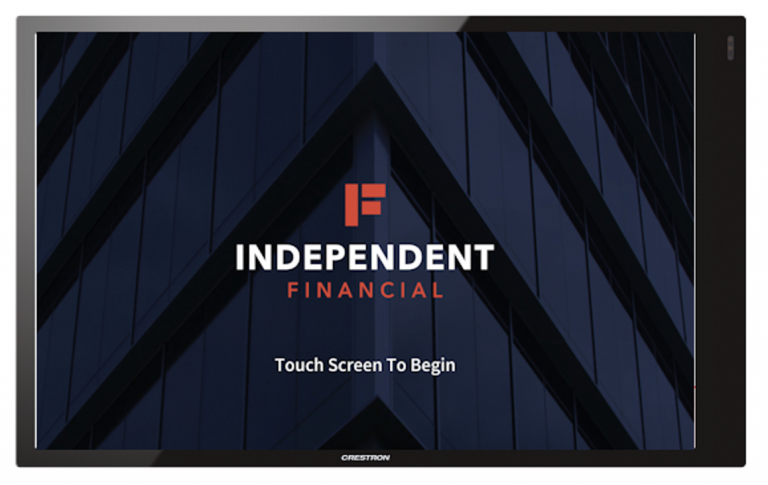
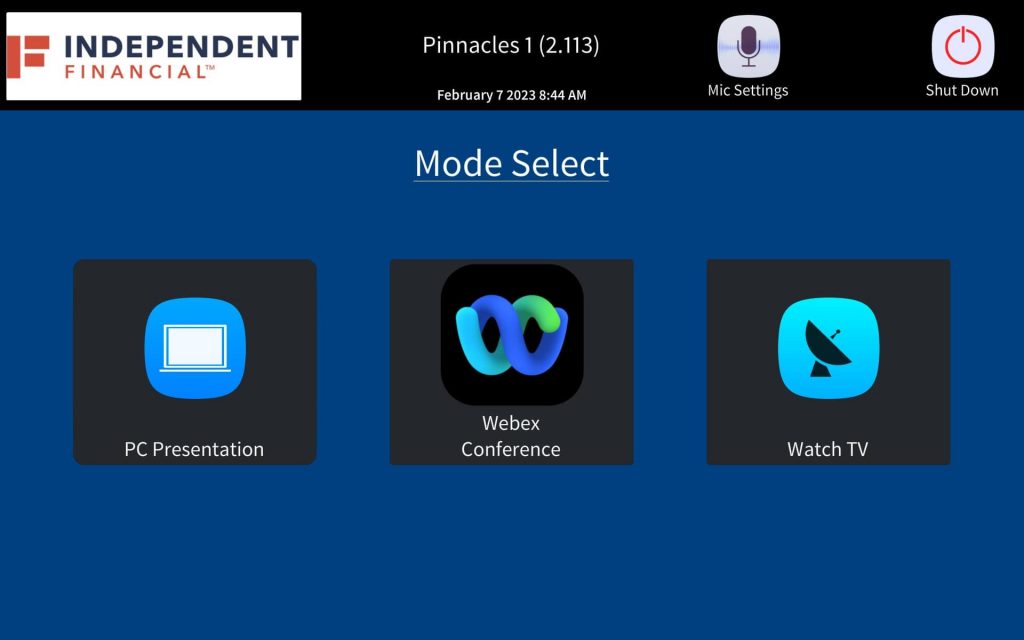
Users must use the Crestron wall mount touchscreen to configure the room for their meeting. Touching the screen will wake up the system.
Users will then be presented with the following three options.
This mode will allow users to display their local machine up on the display. This mode does not support the conferencing functionality.
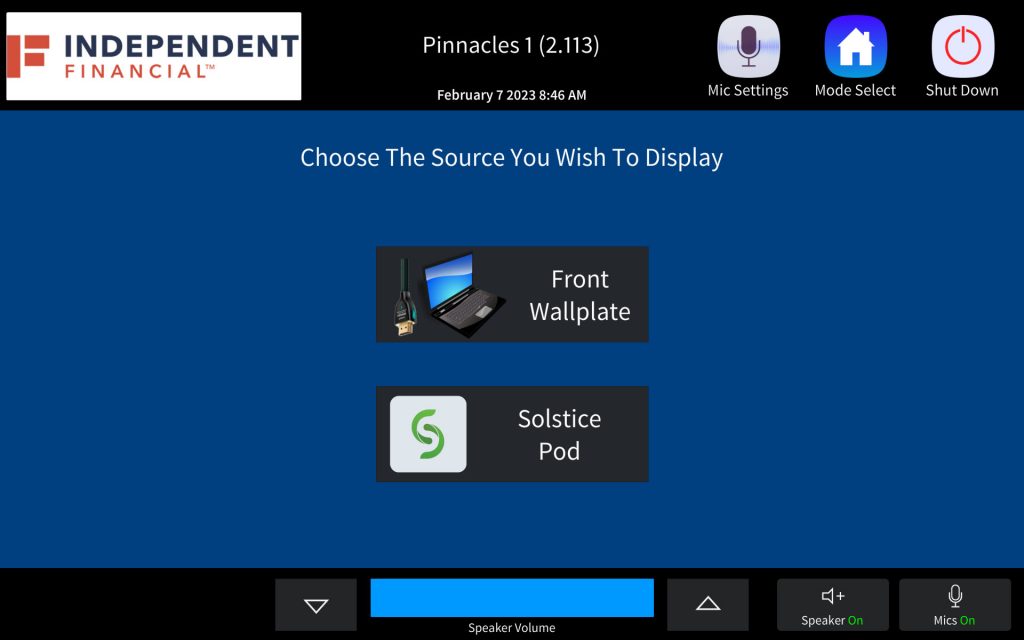
The available sources and displays with vary greatly depending on the current room configuration.
When only a single display is available, users simply touch the source they will wish to display.
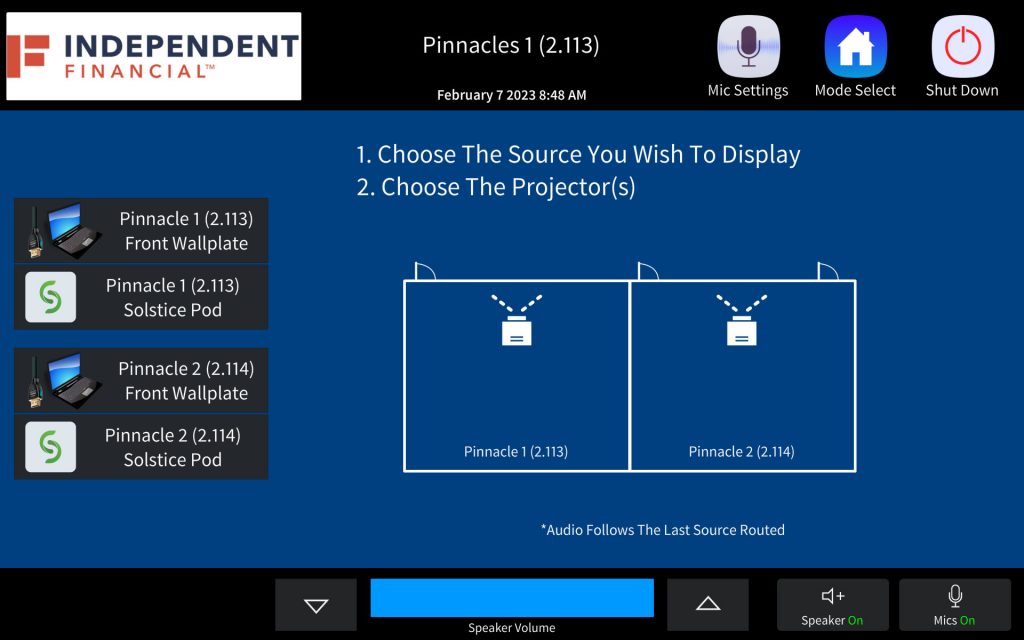
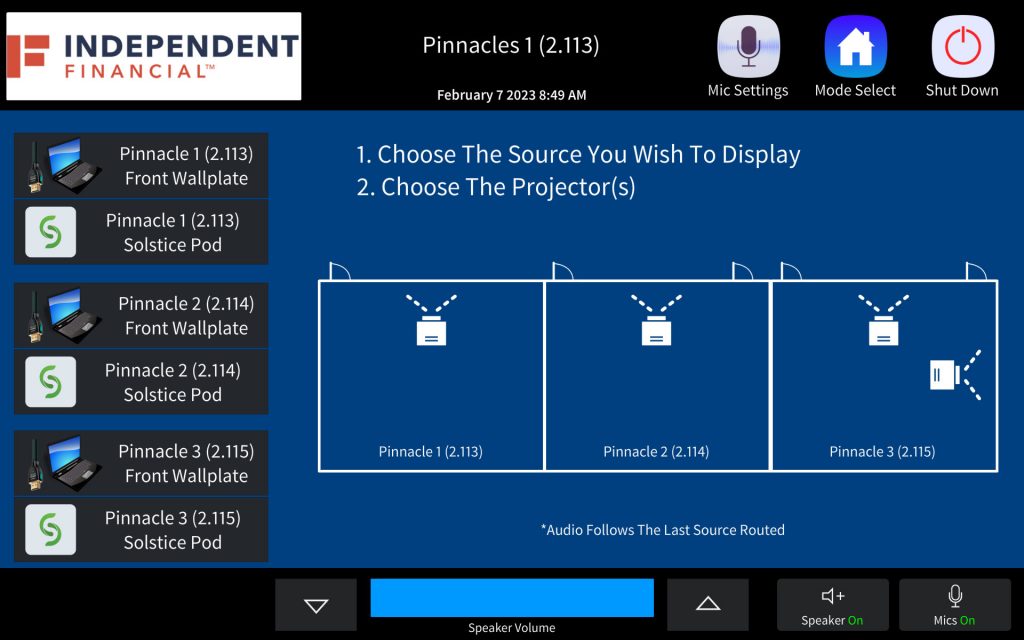
For combinations containing multiple displays, routing is a two step process. First select the sources from the list on the left, then touch the desired projector on the right.
Users may route the same source to multiple projectors or different sources to different projectors.
Note: Audio will always be default to the last source routed.
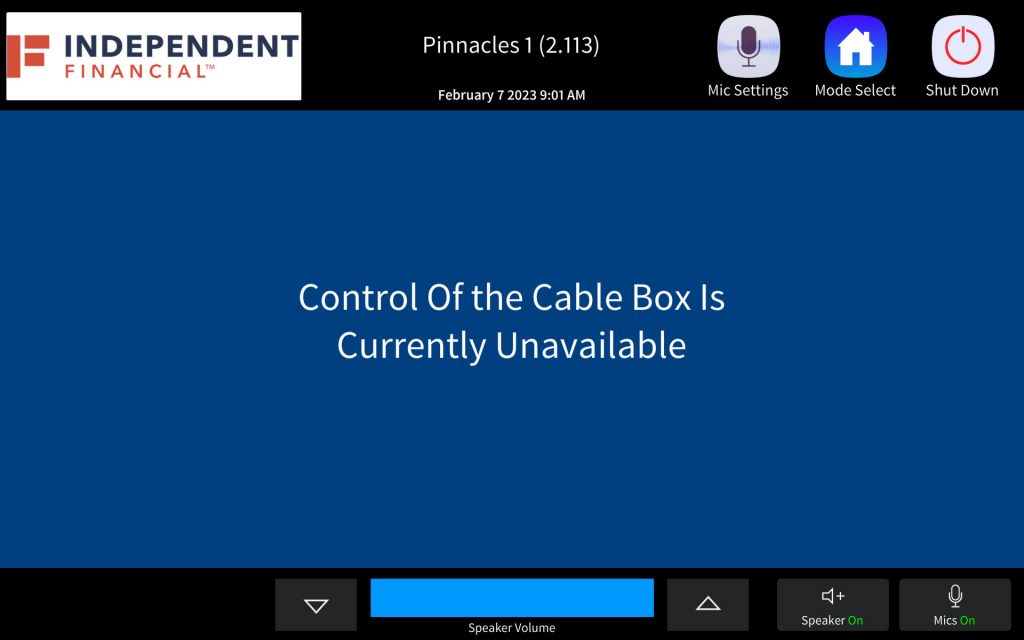
Selecting the Watch TV mode will route the cable box to all avaiable displays in your current configuration.
Channel control is handled by IF facilities. Please contact facilities to change the channel.
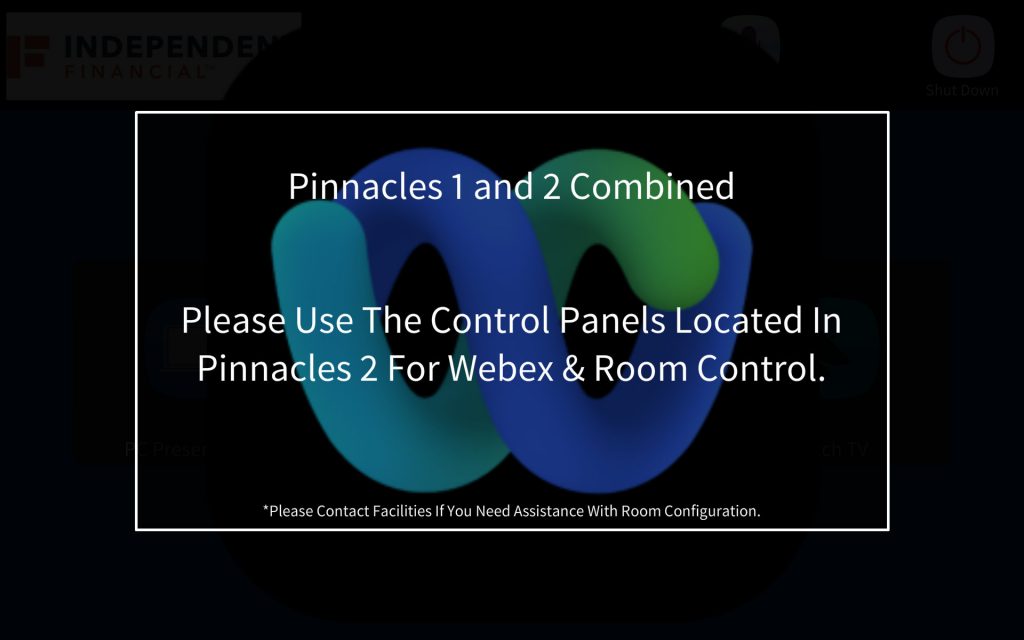
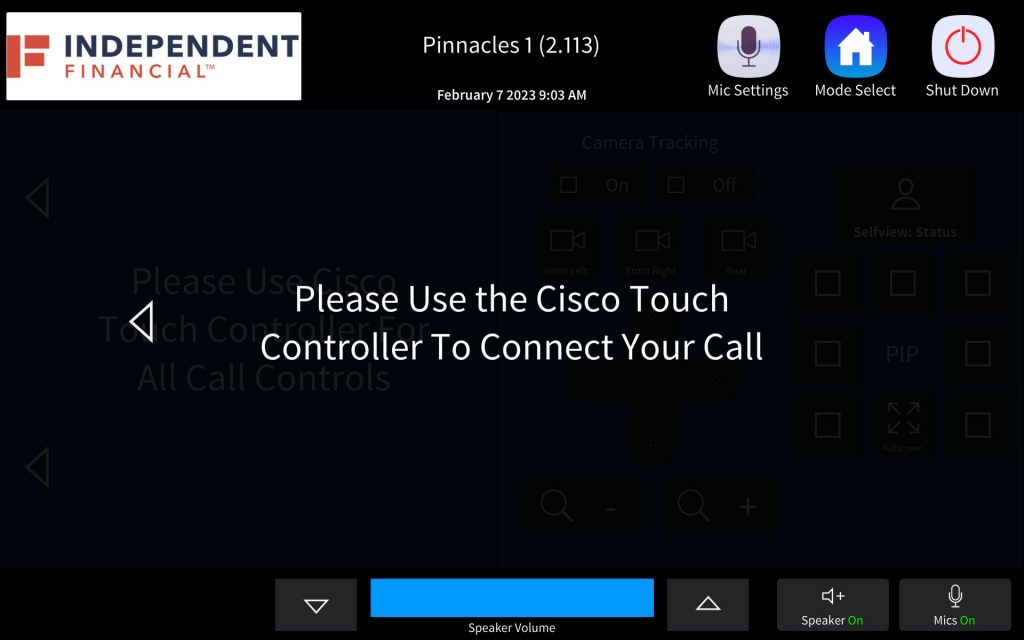
Selecting WebEX Mode will route the Cisco web device to all projectors in your current configuration.
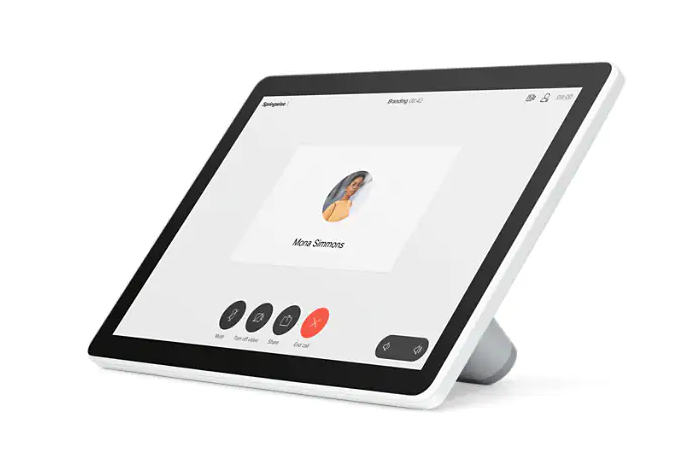
The Crestron Panel will then direct you to the Cisco touchscreen device for all calling controls, please note that the user must use Room 2’s Cisco touch controller when rooms are combined.
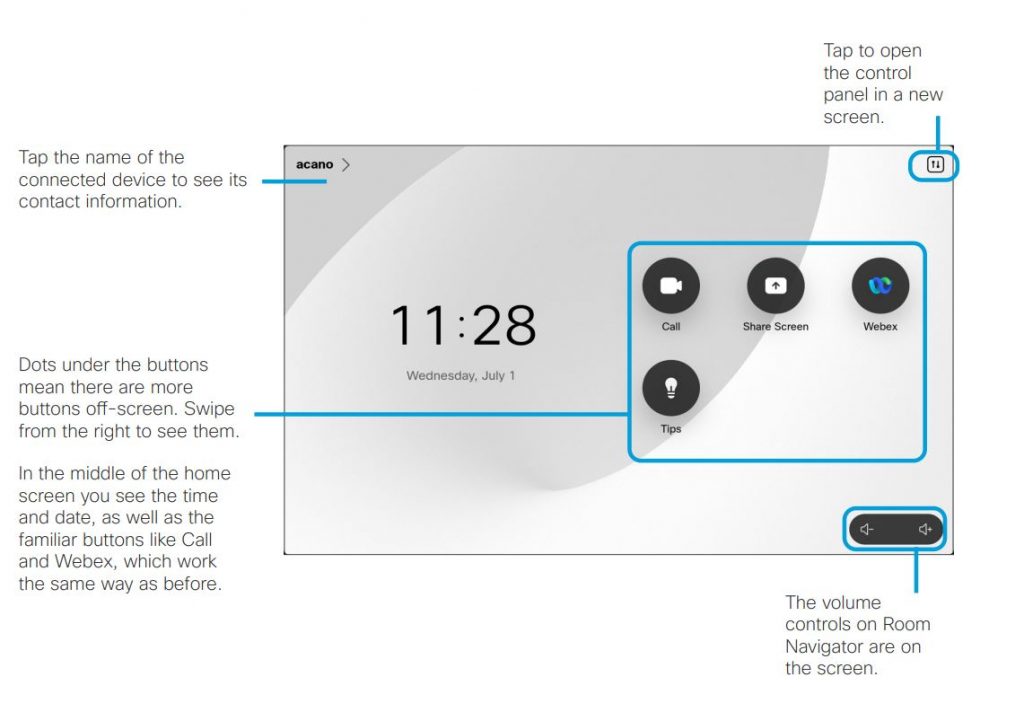
Cisco Touch 10 and Room Navigator support the new RoomOS 11 operating system. While most familiar features work in the same way as before, some have changed, or you access them in different places. There is also new functionality available. This guide introduces some of the new features and changes to existing ones that you’ll find on the RoomOS 11 user interface on Touch controllers connected to Board and Room Series devices.
Cisco Touch 10 and Room Navigator support the new RoomOS 11 operating system. While most familiar features work in the same way as before, some have changed, or you access them in different places. There is also new functionality available. This guide introduces some of the new features and changes to existing ones that you’ll find on the RoomOS 11 user interface on Touch controllers connected to Board and Room Series devices.
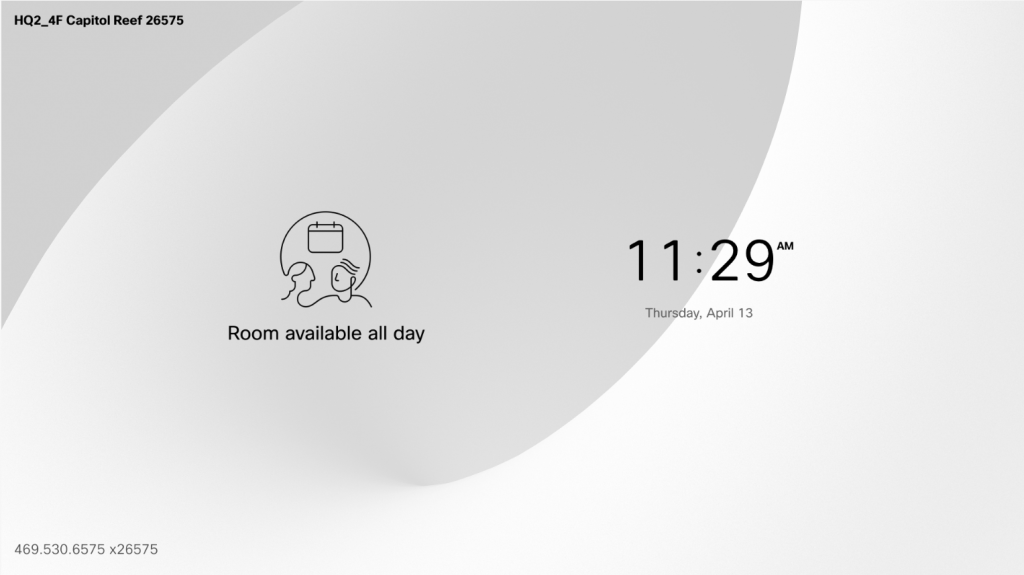
In the upper left hand corner of the homescreen you will see the Room Name.
In the lower right hand corner you will see a QR code to take you to the digital instructions.
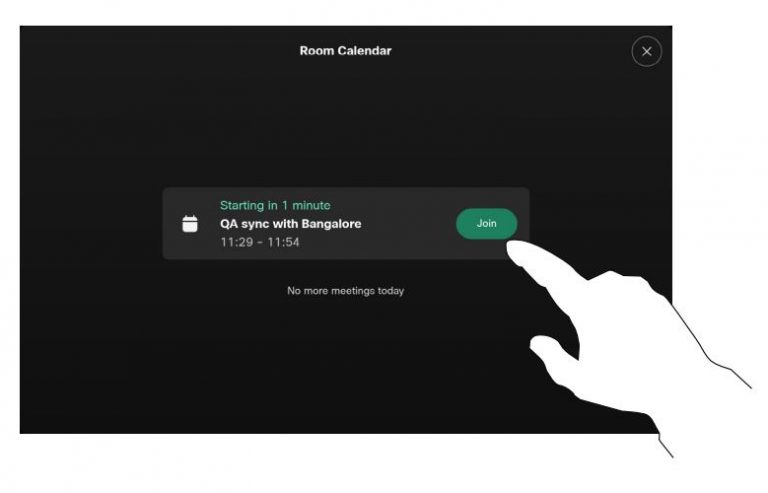
Your video device may be connected to a management system capable of scheduling video meetings. Any meetings scheduled will then appear as shown at left.
Tap Join to participate in the meeting. Should the meeting have started already, you may still join. When a scheduled meeting appears on the device screen, the device wakes up from stand-by.
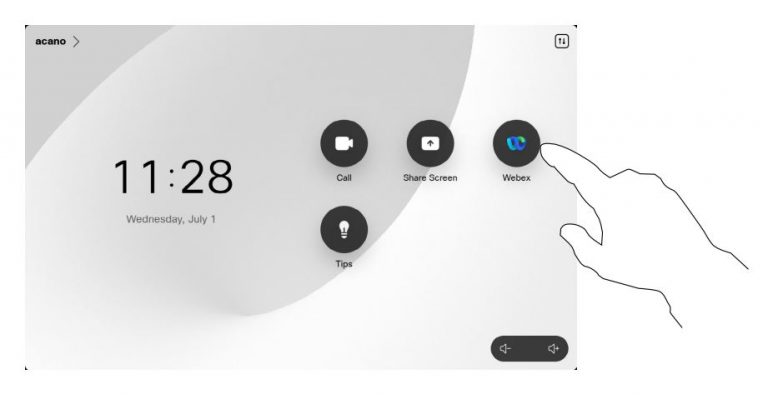
Tap Webex. Then type in the meeting number you received in your invite and tap Join.
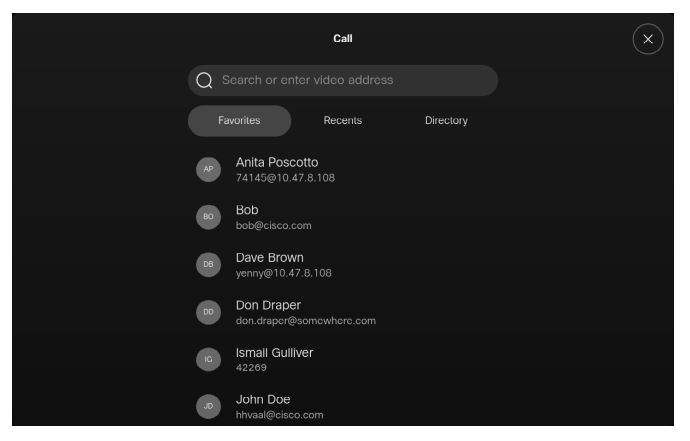
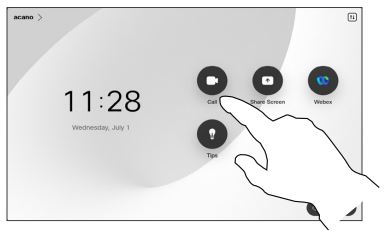
Tap the Call button to open your contacts lists. The contacts list consists of three parts:
Favorites. These contacts are put there by you. These entries are those you call frequently or otherwise need to access in a swift and convenient manner from time to time.
Directory is typically a corporate directory installed on your device by your video support team.
Recents is a list of calls you have placed, received or missed earlier.
Note that removing entries from Recents can only be done from the web interface.
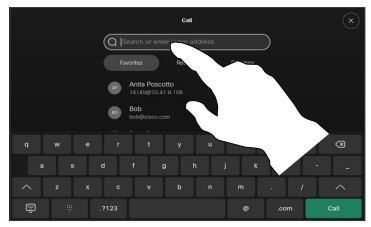
You can call someone who is not listed in your list of contacts by keying in their name, address or number using the virtual keyboard of the Touch pad.
Anyone you have previously called or who has called you, appears in the Recents list and you can transfer any of them to your list of Favorites. This is described in the section Contacts.
Sometimes you need to enter numbers during a call, typically to reach extensions or to provide a pin code.
Tap Touch Tones (this button appears as soon as the call has been placed) to invoke the keypad needed for this.
Note that Recents can be cleared from the web interface only
Tap the Call button.
Tap the Search field.
Start typing a name, number or address. Possible matches appear as you type. If the correct entry appears in the list tap it, otherwise keep typing.
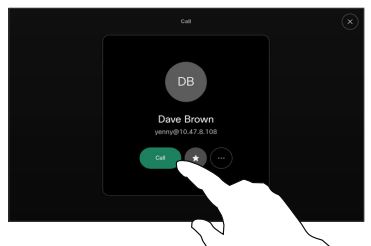
When you find your contact tap the name and then tap the green Call button.
Share content on your Cisco device by connecting your PC to the device with a USB-C or HDMI cable, or, share wirelessly with your Webex app, Cisco Proximity, or Miracast®. When Miracast is enabled, you can share content wirelessly from your laptop to a Cisco device without a client. This works both in and out of calls: to share in-call, start the call first.
Note: Your device may be configured so one of the video input connectors shares HDCP protected content, so you can watch video through Google ChromeCast, AppleTV or a HD TV decoder etc. This feature is available outside calls only. If you attempt to share content through this specific video connector in call, the part of the screen allocated to content sharing turns black to maintain the HDCP regime. This applies to any content you attempt to share in call from this input connector—HDCP protected or not.
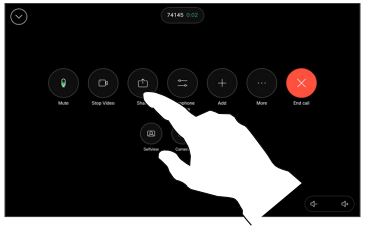
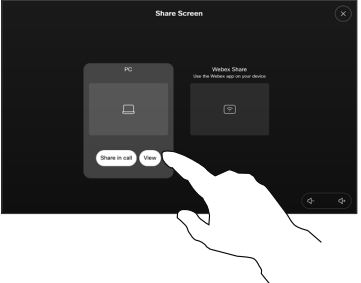
If using a cable, connect your source and make sure it’s switched on. In a call, open the call controls and then tap the Share button.
Select your source. Tap View for a preview. No one can see your computer screen yet – tap Share when you’re ready. Or tap Share in call to share immediately.
To stop sharing content, tap Stop sharing
You may also use your device in local meetings to present and share content outside calls.
If your source device has been Intelligent Proximity enabled, just switch on Proximity on it. Pair the source device with the video device and you can share content right away.
Tip! Multi-screen devices may show as many independent presentations as there are screens. This is possible outside calls only.
Note: We recommend that the first presentation to be connected is wirelessly connected, then the cabled one. If you do it the other way around, the inital connection may get disconnected.
HDCP: Your device may have been configured to let one of the video input connectors of your device share HDCP protected content, thus allowing you to watch video through Google ChromeCast, AppleTV, or a HD TV decoder. See the previous page for more on this.
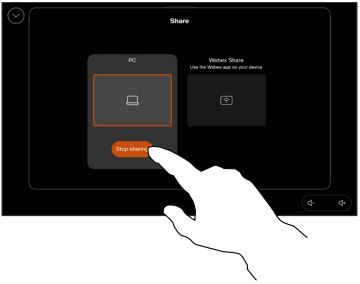
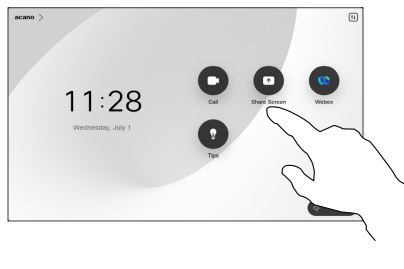
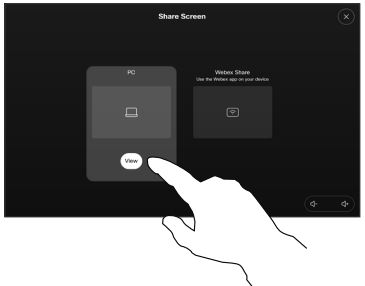
Connect your source device, make sure it’s switched on and tap Share screen on the touch controller’s homescreen.
Select your source and tap View. Tap Stop sharing to end the session.
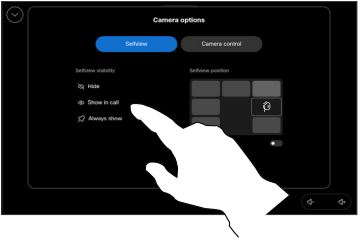
The selfview shows what others see from your device. You can use it to confirm that they see what you want them to see.
You can see, adjust, and move your selfview around the screen both in and out of call.
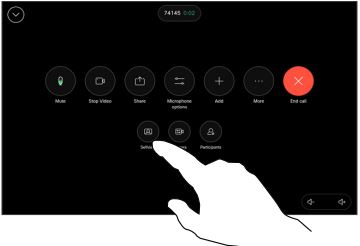
To check your selfview at any time, open the control panel. As long as your camera is open/on, you’ll see your selfview on the device’s screen. Tap Camera on the controller and then select Selfview. Here, you can:
During a call, open the call controls. Tap Selfview.
You get the options to set visibility, move, or change your selfview to fullscreen. Tap outside the camera options screen to exit.
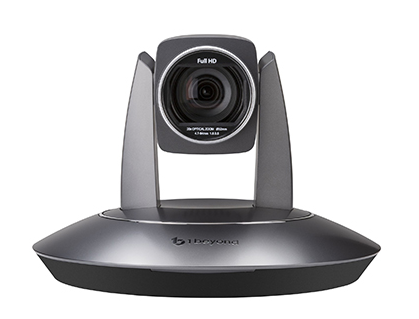
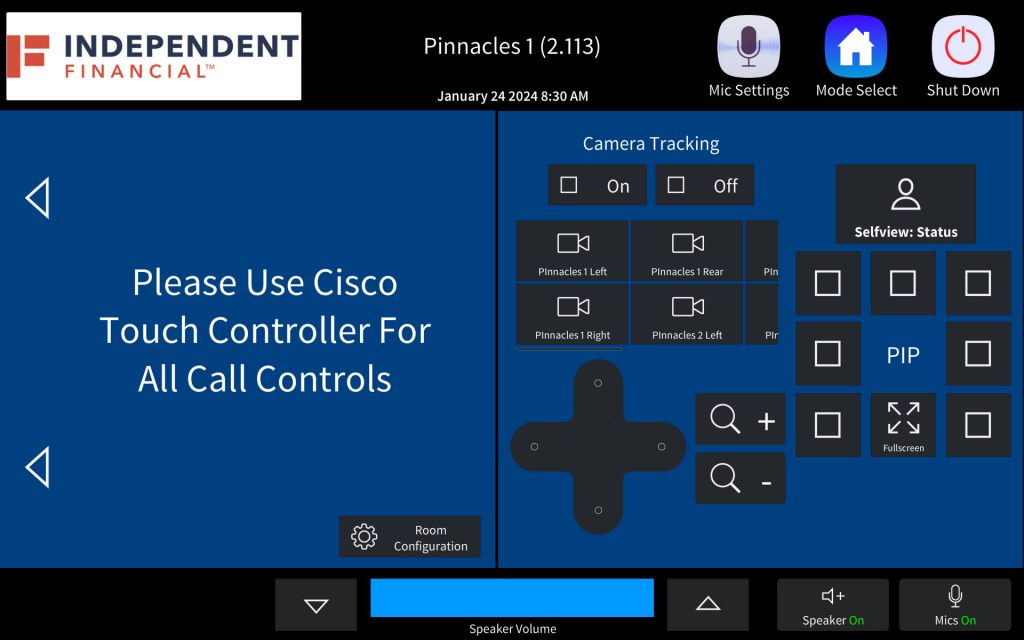
The Pinnacles rooms are fitted with auto-tracking cameras that will automatically find and display the current speaker, anywhere in the space. This is the preferred setup for this space and users are recommended to leave the mode in Auto.
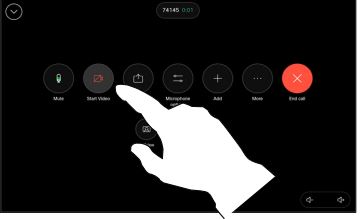
Control the video transmission from your camera on devices that do not have the option to mechanically block the camera.
Open the call controls during a call
Tap the Stop Video button. Tap Start Video to turn the outgoing video back on.
If the user wishes to manually control the cameras, the users can turn off the camera tracking from the Crestron panel.
All available cameras in the current room configuration will be available to select and control using the pad and zoom buttons.
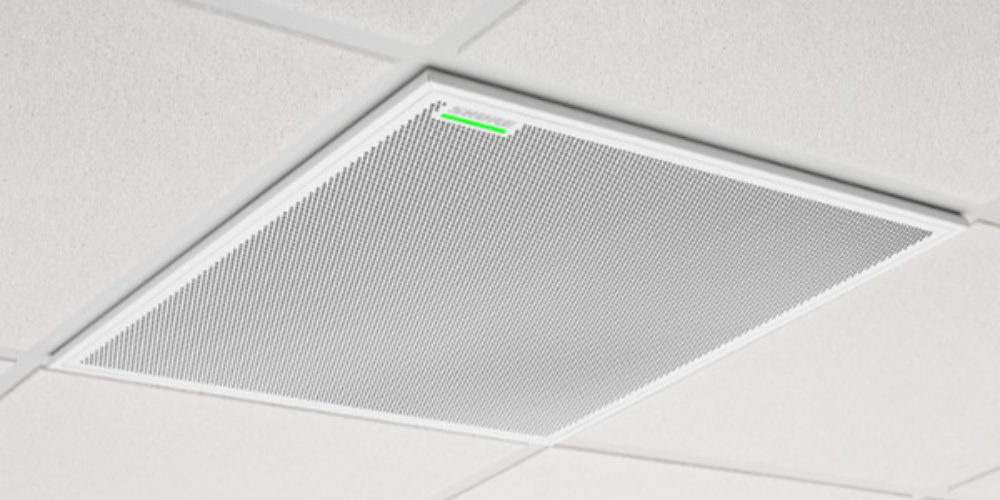
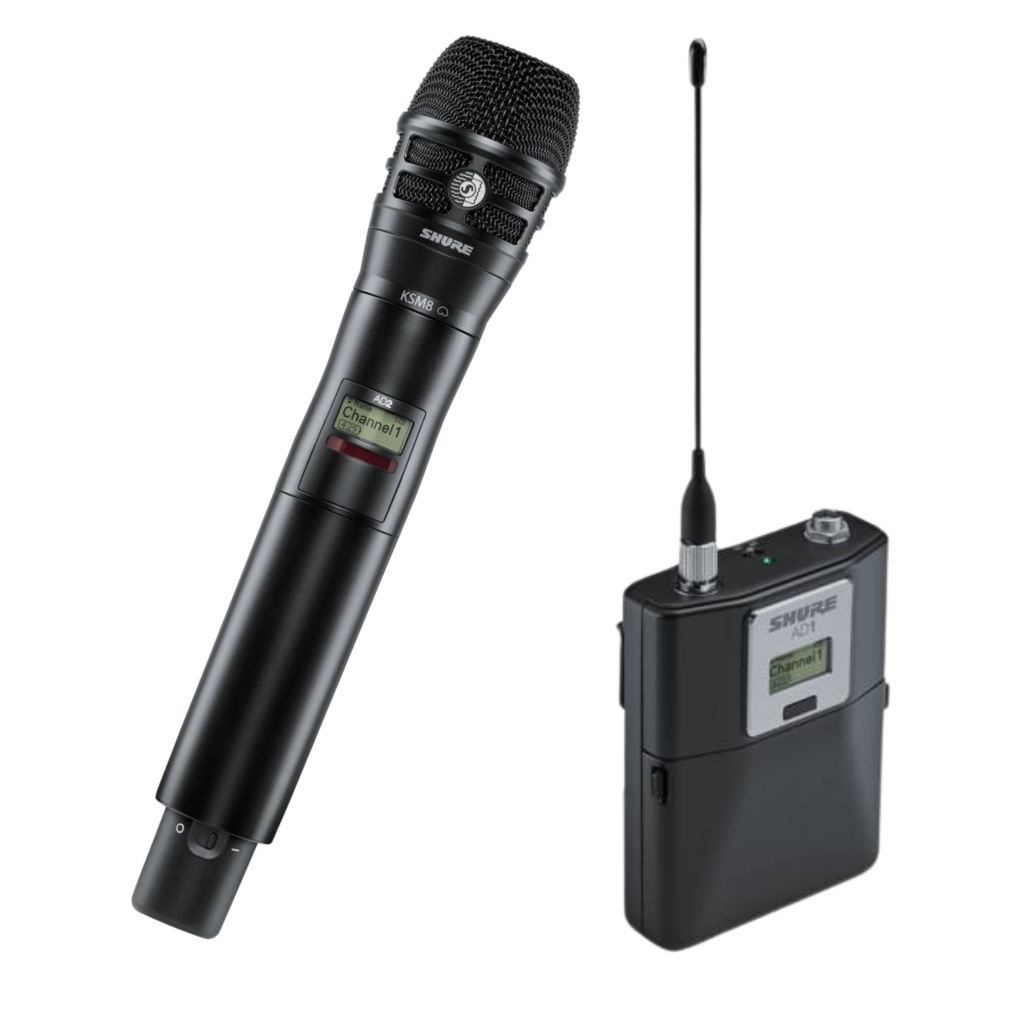
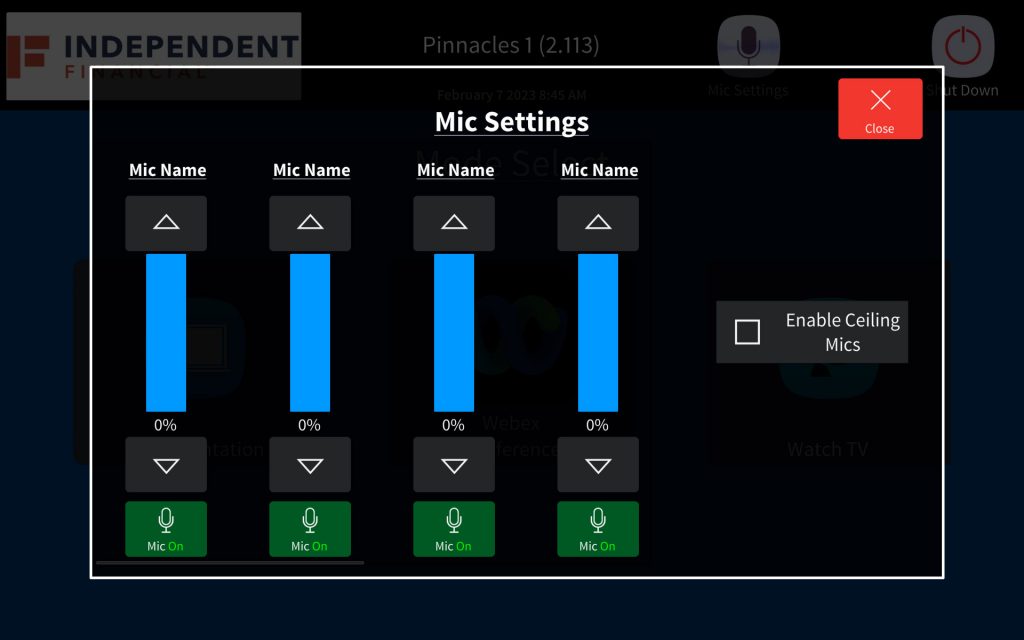
Each room contains ceiling microphone arrays that pick up all audio in the room. If the user requires a lavalier or handheld microphone for audio enhancement, please contact IF facilities for this option.
Tapping the mic icon from any page will open the microphone controls. All microphones in your current configuration will available to select here. From here you can raise and lower the input of each individual microphone.