Quick Tips for Microsoft Teams

Setting Up A Meeting

Join a Scheduled Meeting that’s not on the Console

  1. Follow the link for the meeting on your personal advice, but stop before joining the meeting
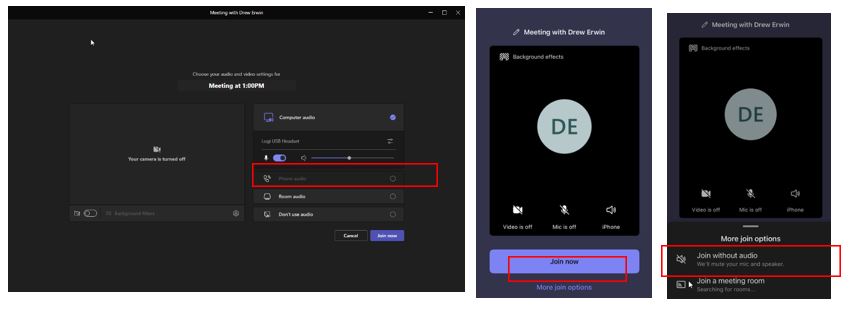
  2. When you are choosing your audio and video settings, you have an option to add a room. This will allow you to use the room’s audio and video equipment. Your personal device will be able to detect the closest room with Bluetooth
  3. From a PC – When setting up your audio options, there will be an option called Room Audio. Select this then search for the room – either DHQ-Rainier or DHQ-Everest.    
  4. From a Phone – From a Phone – There will be an option at the bottom of the page called Other Join Options, select Add a Room and search for the room that you are using – either DHQ-Rainier or DHQ-Everest

5. If you have already joined the meeting on your personal device, you can select Show Participants, then go to Invite Someone and search for the room name.
6. To Join the Meeting, select Join on the console

Join a Schedule Meeting

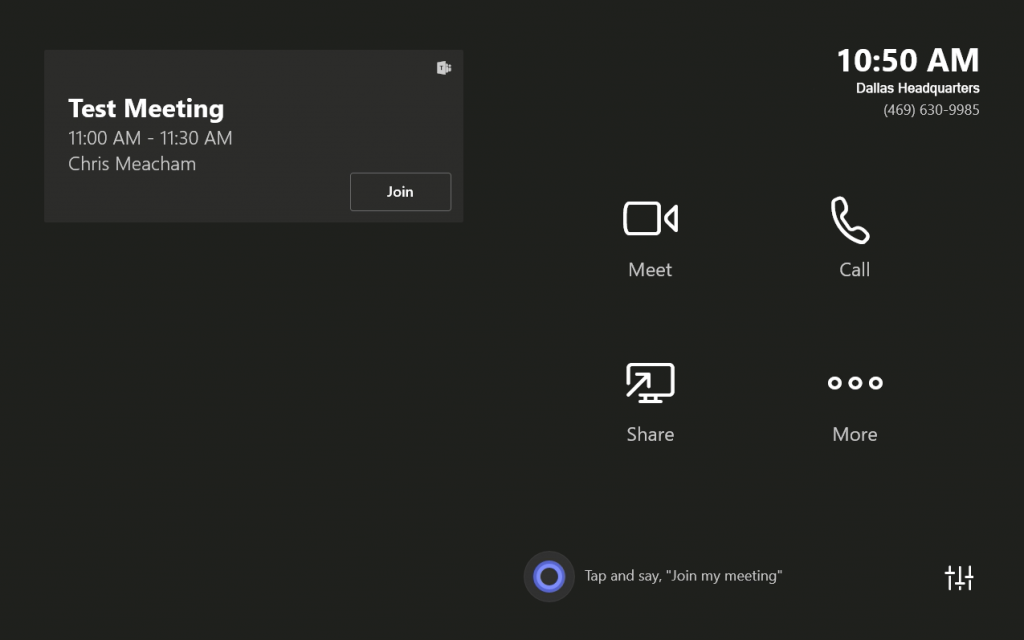
The touchscreen console in a conference room is the heart of every meeting. On the screen, there are a things you can do:

  • Join a Scheduled meeting by selecting the meeting.
    If the meeting shows 3 dots instead of a Join link, the meeting was not setup correctly as an online meeting. Please contact Technology or join the meeting through one of the other join methods.
    Note: To get a meeting to show on the room console, organizers should set the room as the meeting location.
  • Start a new meeting by selecting Meet Now. This will allow you to create an impromptu meeting and invite multiple participants.
  • Create a call with a single participant by selecting Call.
  • Project your laptop by plugging in the cable connected to the console. The content should be projected to the room automatically, but you may have to select Present on the room Console
  • Select More for the instructions on how to add the room to a meeting, join a meeting with a meeting ID and password, or change accessibility settings.

Managing A Meeting

Managing the Screen Layout

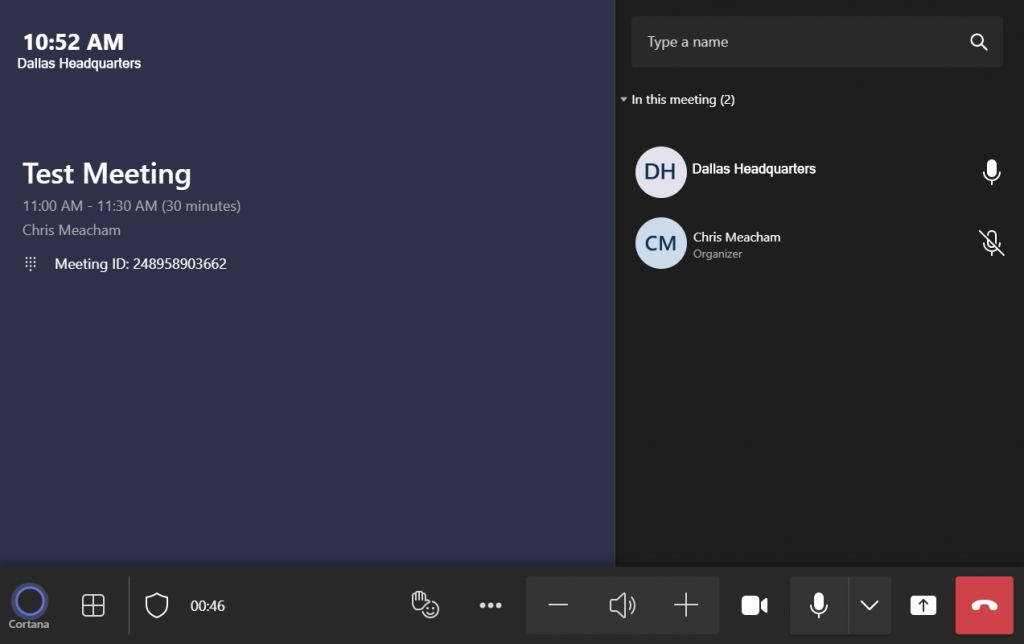
  • Select the icon in the bottom-left corner of the device to change the screen layout. This will allow you to change the format that participants appear on the screen, or allow for only presented screens to appear instead

Manage Audio

  • Select Mic on the room console to mute or unmute the room mic.
  • Select Volume Up or Volume Down to adjust the speaker volume or mute the speaker.
  • Mute participants by going to Participants, selecting a name, and then Mute Participant.

Manage Video

  • Select Camera on the room console to turn the room camera on and off

Use Reactions

  • Select the emoticon icon to use reactions during a meeting.

Share Screen

  • Project your laptop by plugging into the cable connected to the console. The content should be projected to the room automatically, but you may have to the select the present icon next to the mic mute

Change Settings

  • Click on the 3 dots next to the volume control to change the following options
    • Activate Live Captions
    • Turn off chat bubbles
    • Turn off incoming video
  • Click on the arrow next to the mic to change the following options
    • Enable or change the setting for volume suppression
Need Further Help?
Contact Us!